Hot Milk Cake!

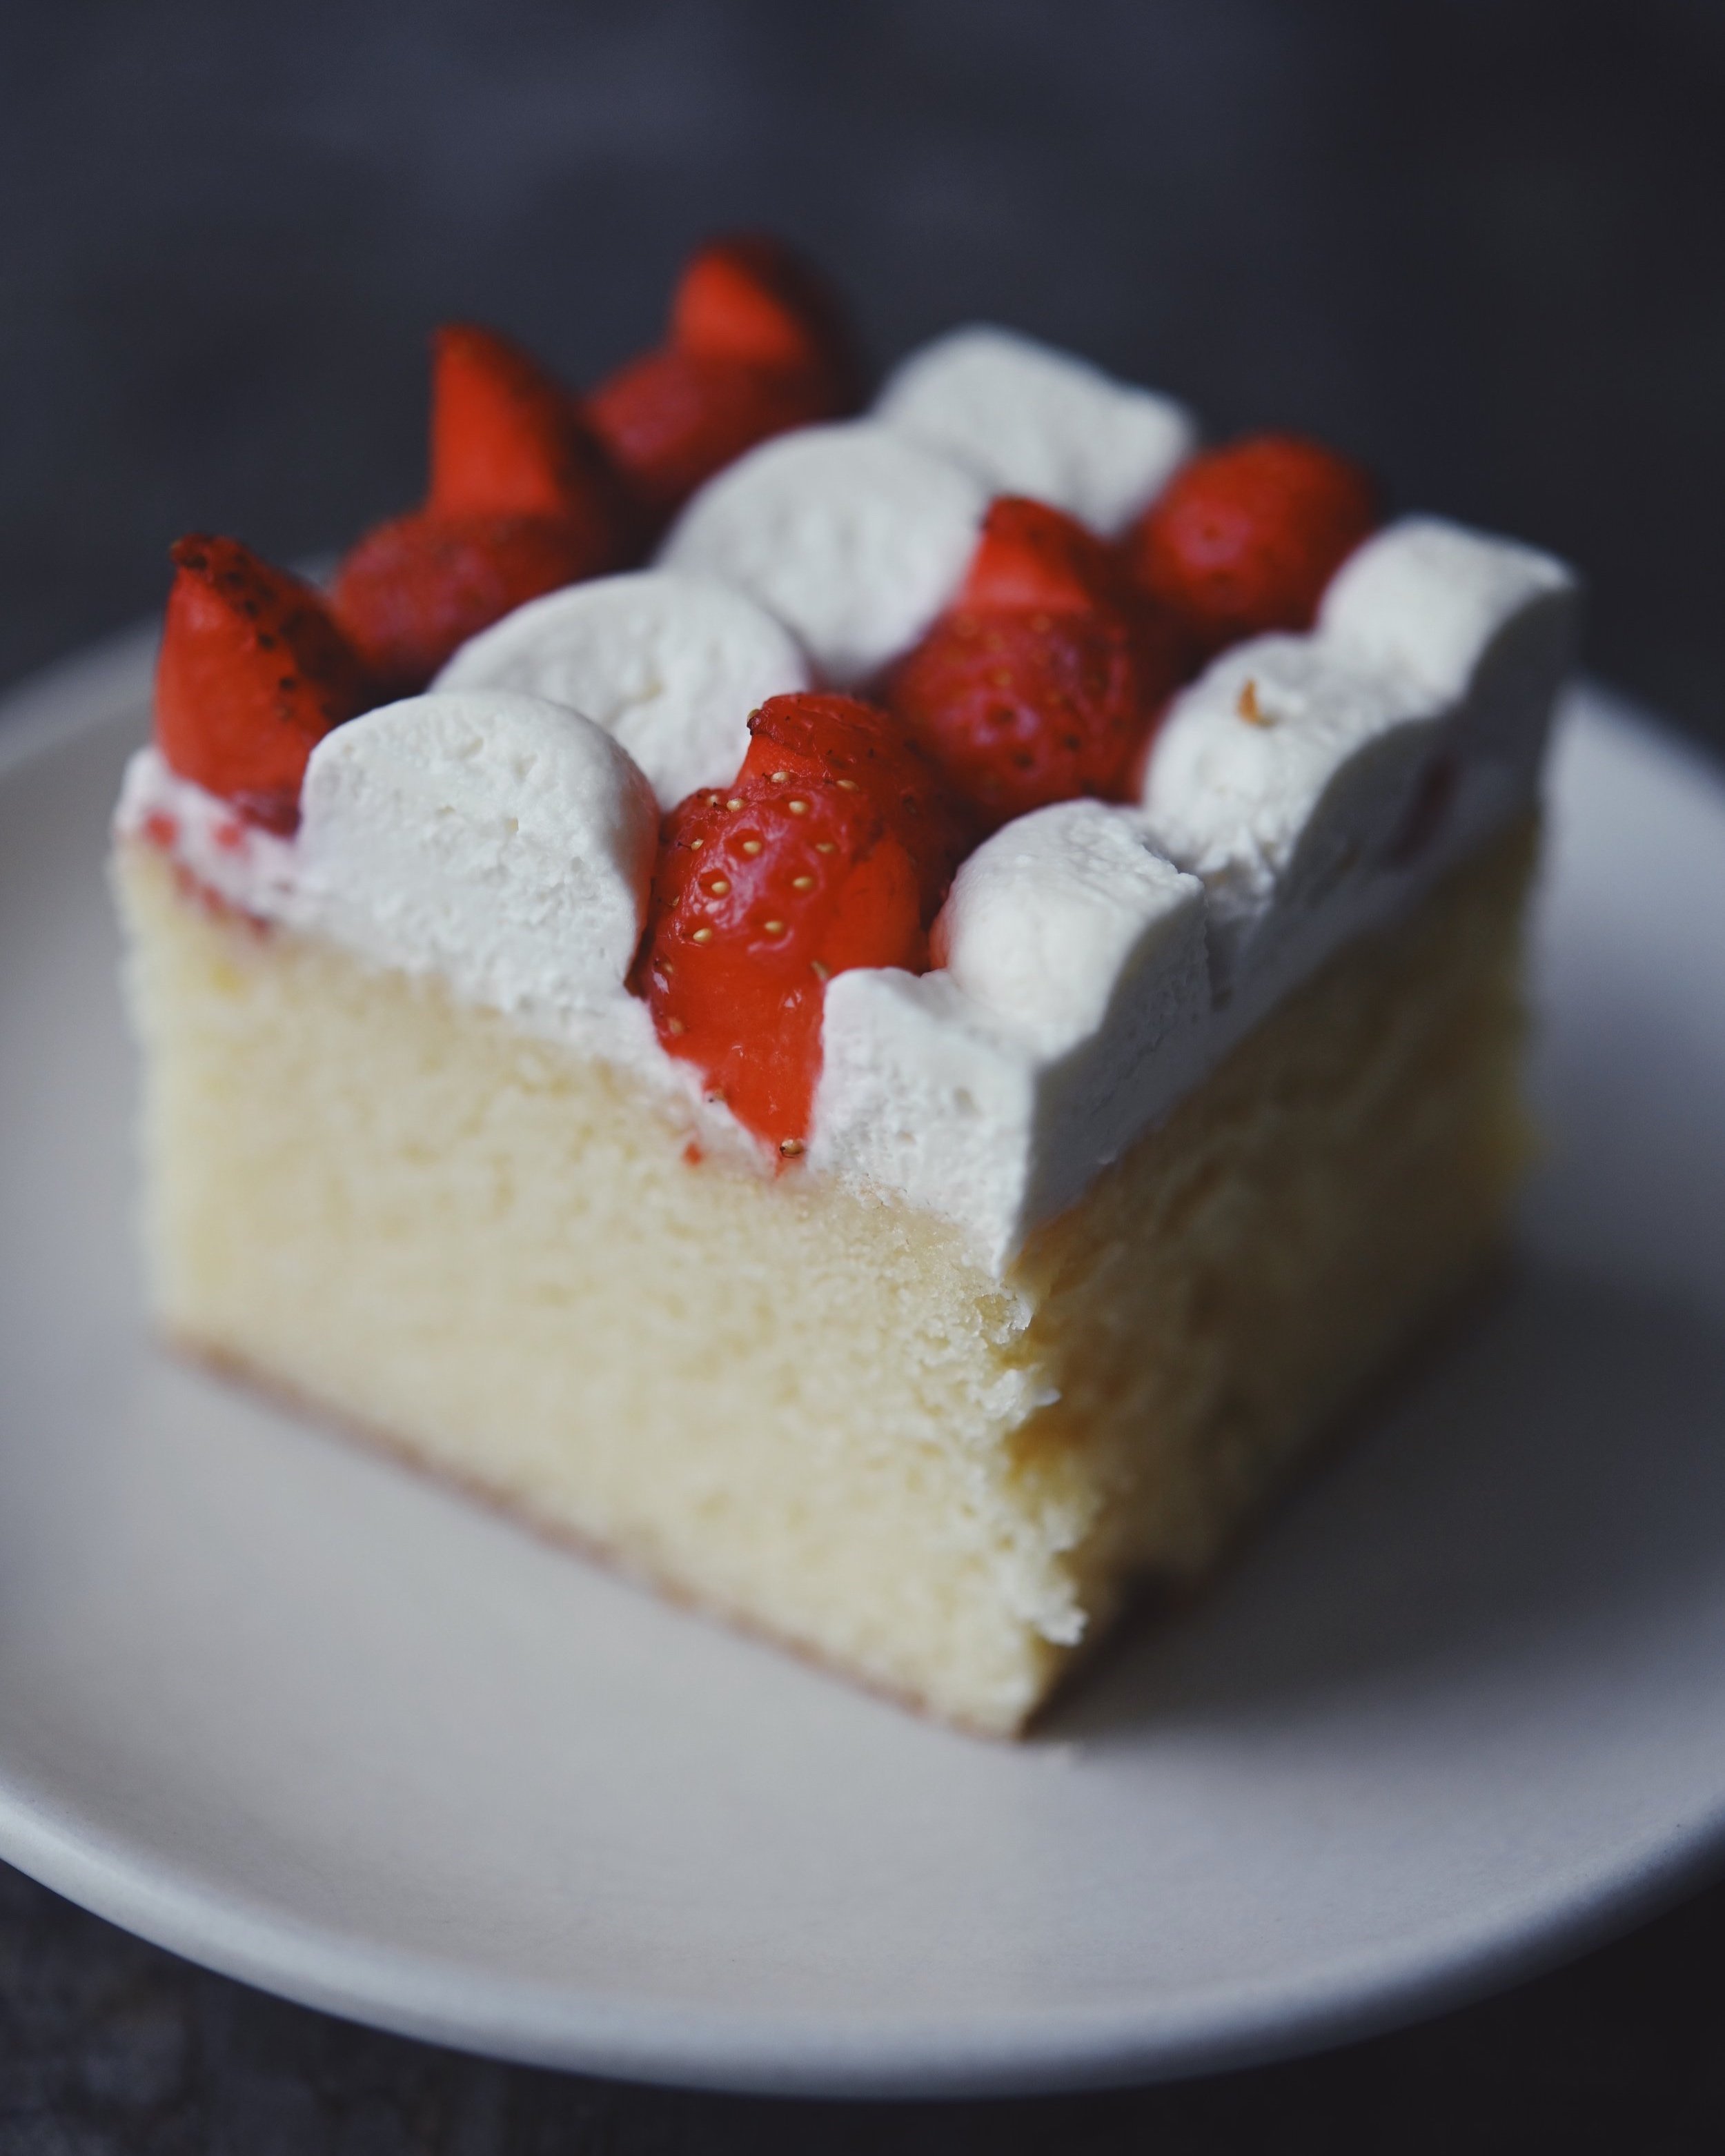
When I look at that title, I am rather not bowled over by an inclination to bake in the midst of summer weather. That said! This old fashioned recipe yields quite possibly the best cake to accommodate however much fresh summer fruit (and whipped vanilla cream) your heart desires. It’s a relatively quick and easy cake that’s ideal for the last minute, and worth turning on the oven for despite heat/humidity. And, it can be enjoyed two different ways…

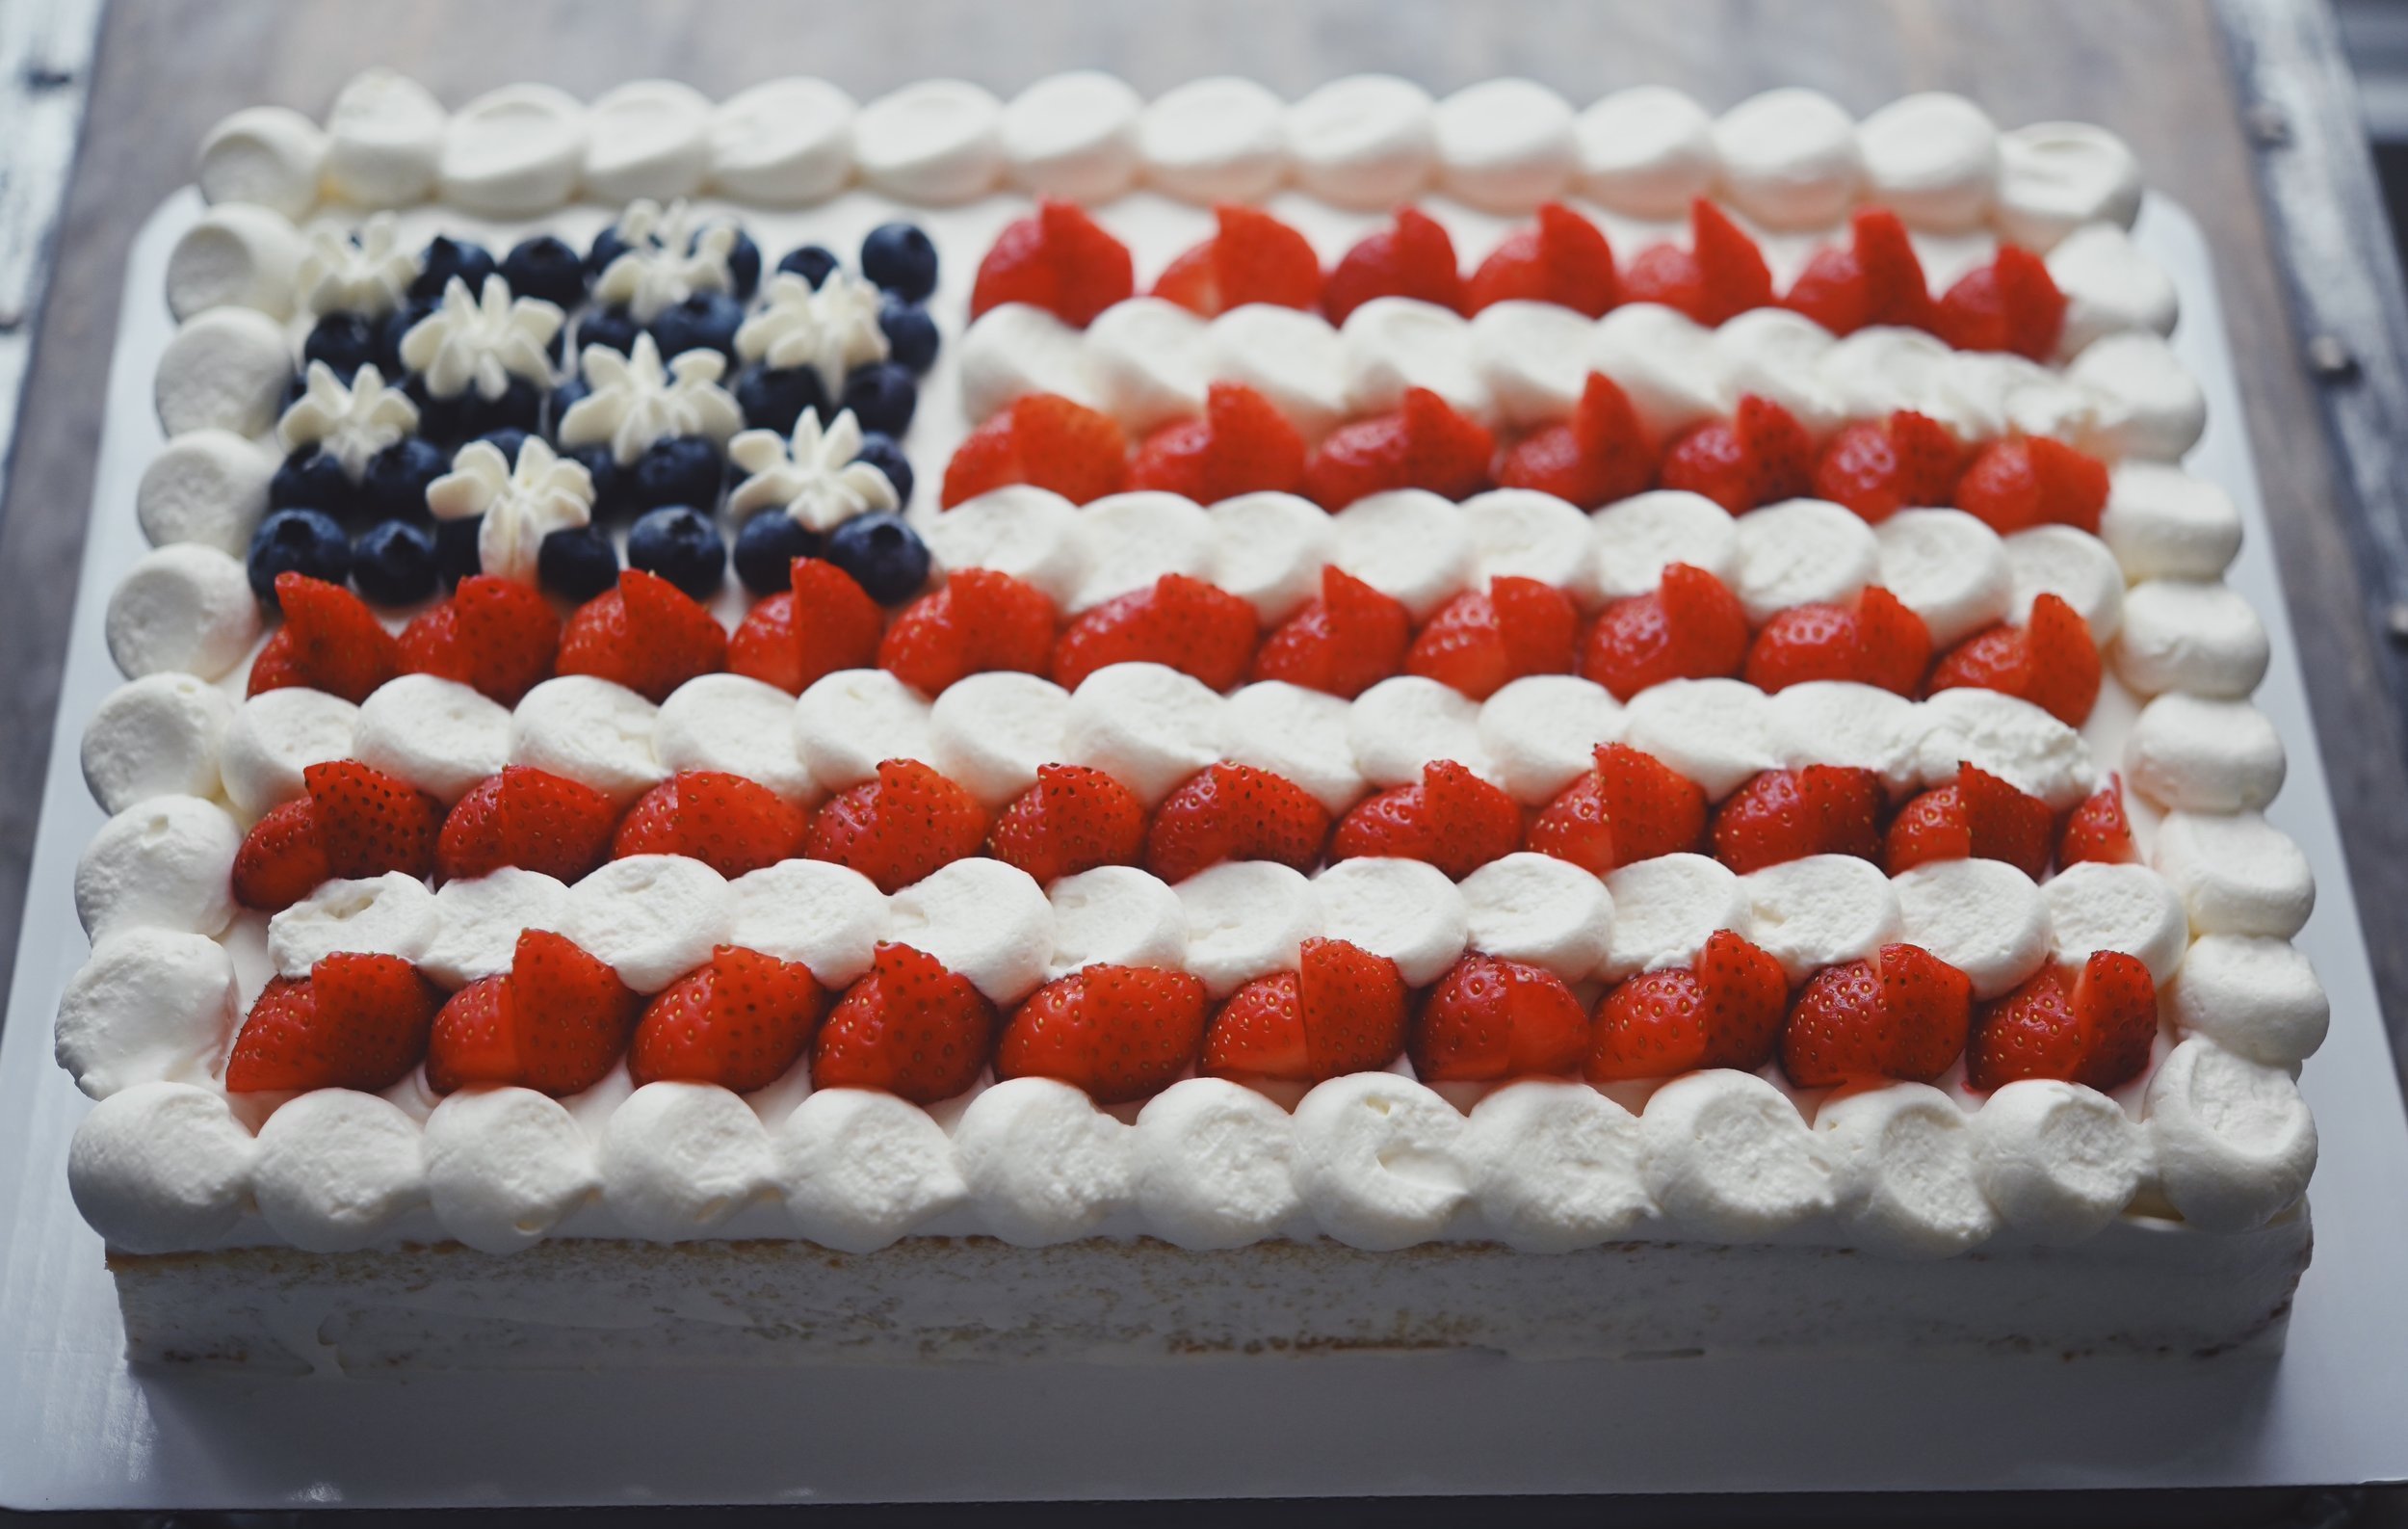
1) as pictured, as a single layer sheetcake covered in berries and cream, awaiting a side of 4th of July fireworks. (I am absolutely planning to revisit with peaches later this summer). …or slice and serve fruit/cream alongside!

2) as my mom made hot milk cake: leave the cake to cool in the pan, and while still warm from the oven, pour a simple glaze over the top, let barely set, and dig in. (my mom and grandmother both served cakes warm with glaze, and I honestly don’t know why I’ve gotten so away from it! I suppose it’s harder to pull off when you’re baking for orders or a bakery/restaurant, but I know that the rest of my 2023 will feature more of this!!)

The crumb is tender yet substantial, fluffy but dense (in a good way). Nearly all of my go-to recipes for layer cakes use buttermilk, so it had been a minute since I’d appreciated the way that regular milk showcases vanilla, which to me is an especially nostalgic taste.

Hot Milk Cake

— Ingredients —

  • 4 large eggs, at room temperature

  • 400g (2 cups) sugar

  • 1 t vanilla extract

  • 1/2 t almond extract

  • 270g (2 1/4 cups) AP flour

  • 2 1/4 t baking powder

  • 3/4 t kosher salt

  • 300g (1 1/4 cup) whole milk

  • 140g (10 T) unsalted butter, cubed

— Direcions —

  1. Preheat oven to 350F. Butter and line a 9x13” pan with parchment, butter the parchment. In a large bowl, beat eggs at high speed for about 5 minutes, or until thick and lemon-colored (the mixture should be thick enough to leave a trail over itself if you lift the mix attachment).

  2. Mixing on medium speed, gradually add the sugar to the eggs in a steady stream. Beat until light and fluffy, then add the vanilla. Whisk together the flour, baking powder, and salt in a separate bowl, then add to the egg/sugar mixture in two batches, mixing gently until just combined. I recommend scraping the sides of the bowl between additions, and after the second addition.

  3. In a small saucepan, heat the milk and butter just until the butter is melted. With the mixer on low-medium speed, gradually add the milk mixture to the batter, mixing until just combined. Run a spatula around the sides and combine any un-mixed portions until smooth.

  4. Pour into prepared pan, and bake until toothpick inserted into center comes out clean, about 30-35 minutes. Cool on rack…douse in glaze or let cool completely!

    (adapted from Taste of Home)

Vanilla Whipped Mascarpone

  • 8 oz mascarpone

  • 240g (1 cup) heavy whipping cream

  • 1 t vanilla extract

  • 25g (roughly 2 T) confectioners’ sugar

    Combine all ingredients in a large mixing bowl, and mix on medium-high. Once it begins to thicken, turn speed to medium-low to avoid over-mixing; you want it to hold shape but still have a little flow! Once you feel like it’s the right consistency, turn to high for a literal second to make sure it’s evenly mixed. Use immediately, as it begins to set if it sits (you can tell which rows were piped first vs. last!).

Buckwheat Pistachio, Apricot & White Chocolate Cookies!

What is it about spring and pistachios?! It must be the green—they hardly cross my mind until about March, and then I find them (and color!) especially irresistible. Using salted, roasted pistachios in these cookies balances the jammy sweetness of Turkish apricots and mellow white chocolate, an intriguing flavor and texture combination bound together by a chewy buckwheat oatmeal dough. There’s something wholesome about them, which means that they’re slightly dangerous to have around…they seem appropriate for breakfast, they’re the perfect afternoon pick-me-up, and there’s so much going on that you always need one more bite. Enjoy!

DSC_4055.jpg

Buckwheat Pistachio, Apricot, & White Chocolate Cookies

yields around 1.5 dozen

Ingredients:

  • 100 g (generous 3/4 cup) buckwheat flour

  • 3/4 t kosher salt

  • 1/4 t baking soda

  • 25 g (1/4 cup) tapioca flour/starch

  • 1/8 t cinnamon

  • pinch of cardamom

  • 80 g (1/4 c + 2 T) light brown sugar

  • 50 g (1/4 c) granulated sugar

  • 90 g (1 cup) old-fashioned rolled oats

  • 4 oz. white chocolate, coarsely chopped

  • 60 g (1/2 c) roasted, salted pistachios, coarsely chopped

  • 65 g (1/2 c) quartered Turkish dried apricots*

  • 114 g (1 stick, 1/2 c) unsalted butter, melted & cooled

  • 1 egg

  • 1 t vanilla extract

*Turkish apricots are unsulphured, which means they’re darker, softer, and sweeter than the brighter, more “tart” and easier-to-find California variety.

Directions:

  1. Whisk together the buckwheat flour, salt, baking soda, tapioca flour, brown sugar, and sugar together in a medium-large bowl. Add the sugar and whisk to combine, manually breaking down chunks of brown sugar if necessary. Whisk in the oats. Finally add the white chocolate, pistachios, and apricots and stir with a spatula to disperse evenly throughout the dry mixture.

  2. In a small bowl, whisk together the melted butter, egg, and vanilla extract. Pour into the dry mixture, and stir until a homogenous dough comes together. Wrap the dough in plastic wrap and refrigerate (or freeze) for about 2 hours, or up to a few days.

  3. When ready to bake, preheat the oven to 375 F and line baking sheets with parchment paper. Scoop the dough into balls about 1.5” in diameter and set 2” apart on the prepared sheet. Flatten slightly with your palm, and bake for about 10 minutes, or until the tops are puffed and the edges are golden.

DSC_3489.jpg

Almond-Anise Butter Cookies!

I feel as though I start every post with superlatives, favorite this and best that, and while I’ve tried to come up with a different way to introduce these…I cannot! These almond-anise cookies are festive, packed with flavor, and fun to make and to eat. It’s a definite favorite cookie of mine, and also the one that’s received the most praise from cookie recipients this year.

As you can tell, these are a spin on Mexican wedding cookies / Russian tea cakes. Instead of pecans or walnuts, I use almonds and add ground anise seeds. The flavors work wonderfully with the structure of this cookie, and I don’t know if I’ll ever make it the traditional ways again!

I typically refrigerate or freeze any and all cookie dough that I make, and then scoop/bake off however much I need at a given time. Since the butter proportion in this dough is high, however, I recommend making and baking right away, or portioning/shaping the cookies before refrigerating/freezing so you don’t wind up chipping away at a cold block of dough when you’re ready to bake!

DSC_4297.jpg

Almond-Anise Butter Cookies

yields about 3 dozen

Ingredients

  • 1 1/2 c (230 g) all-purpose flour

  • 1/2 t kosher salt

  • 1 t anise seeds, finely ground

  • 1 1/4 c (140 g) raw / blanched almonds, toasted & cooled

  • 1/4 c + 1 T (56 g) granulated sugar

  • 3/4 c (1 1/2 sticks; 171 g) unsalted butter, room temp

  • 1 t vanilla

  • 2 c (230 g) powdered sugar, for coating

Directions

  1. Whisk together the flour, salt, and ground anise seeds in a medium bowl and set aside.

  2. Process the almonds and 1 T sugar in a food processor until the almonds are finely chopped. (careful not to turn it into butter, though!) Set aside.

  3. With the paddle attachment, cream the remaining 1/4 c sugar, butter, and vanilla in the bowl of an electric mixer until light and fluffy, scraping down sides of bowl as needed.

  4. Add the flour mixture into the butter mixture, mixing slowly until the dough has almost come together. Add the almonds and gradually increase the speed until the mixture is evenly combined. Do not over-mix—remove bowl from mixer and target any spots that need incorporating by hand if need be!

  5. The high butter content renders this dough best to work with at room temp, so roll and bake the cookies right away or roll them to store in the refrigerator or freezer to bake off later.

  6. If baking right away—heat oven to 325 F, and line baking sheets with parchment paper. Roll the dough into 1” balls and place about an inch apart on the prepared baking sheets. Flatten them slightly with your palm. Bake the cookies for about 22-27 minutes (about 30-34 if baking from refrigerator, 35 if baking from frozen), until the bottoms are golden, and the tops are firm when pressed. You want these to be totally baked through/dried out—they need to be light and crisp! Take measures to ensure even baking—rotate the pan mid-bake, and if you’re baking multiple sheets at a time, switch them between the racks. While cookies are baking, place powdered sugar in a medium/small bowl.

  7. Once cookies out of the oven, transfer to a cooling rack. As soon as you can (I do this pretty much right away), toss each cookie in the powdered sugar to coat completely, and place back on cooling rack. Let cool & enjoy!!

fullsizeoutput_1ffa.jpg

Spiced Eggnog Rum Cakes!

These came about after an impulsive eggnog purchase the other day. In the days that followed, as I was met again and again by the eggnog each time that I opened the refrigerator, I felt a little ridiculous. It’s not as though I was necessarily looking forward to pouring a glass. What to do with it—?

Cake, naturally! This is a spin on one of my favorite recipes—spiced buttermilk rye. I switched buttermilk for eggnog, and traded cardamom for nutmeg. It worked quite well; the eggnog flavor is pronounced but well-balanced amidst the warm spices, earthy hint of rye, and luscious texture. I brushed the cakes with a good amount of brandy as soon as they were out of the oven; could also use bourbon or rum! As for topping, a simple, light whipped cream—with hint of vanilla or with splash of eggnog—would be nice, as would a cream cheese frosting, as would buttercream. I had some caramel and also some vanilla buttercream on hand, and decided to go that route with it. Finally, dust with freshly grated nutmeg!

I baked them in a financier tin because….just because. Of course a muffin/cupcake tin would work instead, or go on and make a layer cake out of it!

DSC_5158.jpg

Spiced Eggnog Rum Cakes

yields about 15 financier cakes or 18 standard cupcakes

Ingredients

  • 1 c (120 g) all-purpose flour

  • 1 c (120 g) dark rye flour

  • 1 t baking powder

  • 3/4 t baking soda

  • 3/4 t kosher salt

  • 1 t cinnamon

  • 1/2 t nutmeg

  • pinch cardamom

  • 3/4 c (1.5 sticks; 171 g) unsalted butter, room temp

  • 1/2 c (100 g) granulated sugar

  • 1/3 c (70 g) light brown sugar, packed

  • 2 large eggs

  • 1 t vanilla

  • 3/4 c (180 g) eggnog, room temp

  • 1/4 c (60 g) creme fraiche

To finish:

  • 1/3 c (80 g) bourbon or brandy

  • freshly whipped cream or other frosting

  • whole nutmeg

Directions

  1. Preheat the oven to 350 F. Generously butter a financier pan, or line a cupcake tin. Whisk together the flours, baking powder, baking soda, salt, and spices; set aside. Add the vanilla to the eggnog.

  2. In the bowl of an electric mixer, cream together the butter and sugars until extremely light and fluffy (5-10 minutes), stopping once to scrape the sides of the bowl. Add the eggs one at a time, scraping the bowl after each addition and mixing well.

  3. Add the dry ingredients in three additions, alternating with the buttermilk, and mixing until just combined before scraping the bowl down and continuing. Finally, remove bowl from mixer and gently fold in the creme fraiche until just combined (do not overmix!).

  4. Divide the batter into the financier pan—batter should fill each cavity just shy of 3/4 full. (same for cupcakes—3/4 full!) Bake for 18-20 minutes, or until cake springs back when lightly pressed on top.

  5. As soon as the cakes are cool enough to handle, invert them onto a cooling rack. If using a financier shape, trim the tops so that they are completely flat, then flip them upside down so that the top becomes the base. Brush tops with brandy or bourbon, repeating until all liquor is used.

  6. Frost with piped or dolloped whipped cream or frosting, then grate nutmeg over each!

fullsizeoutput_20dd.jpg
fullsizeoutput_20cb.jpg

Oatmeal-Snickerdoodles!

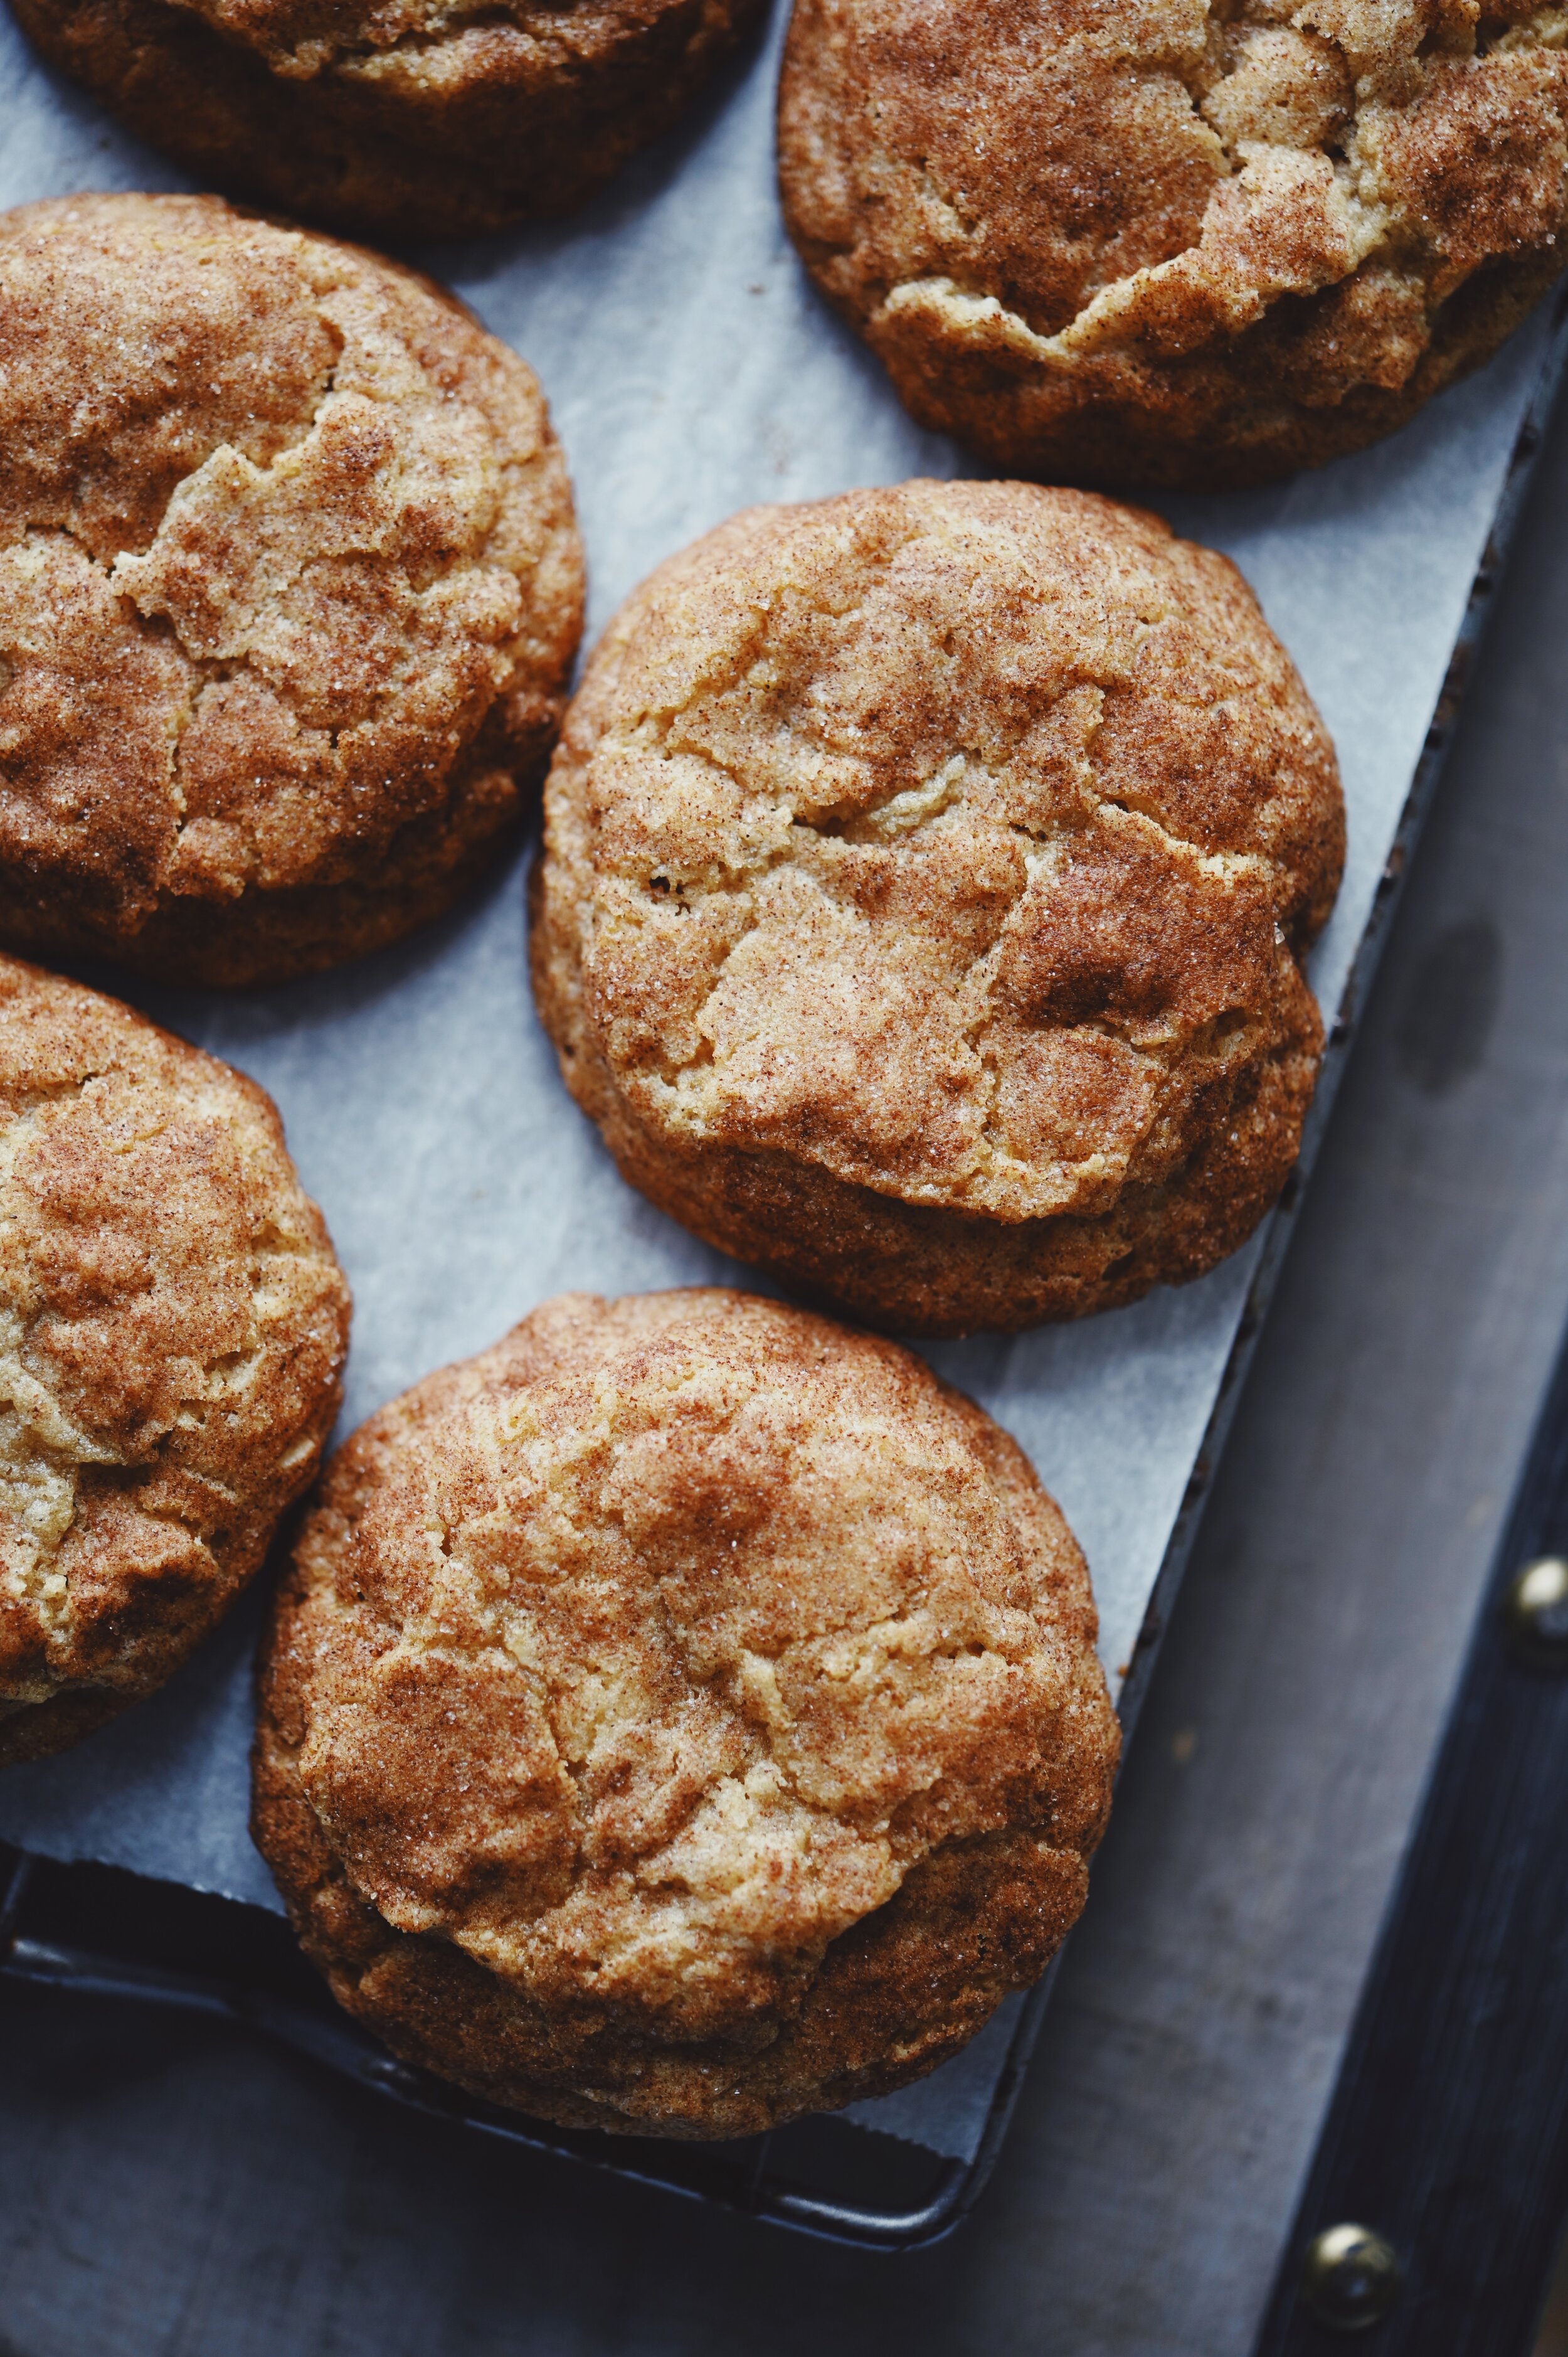
These are the snickerdoodles that my mom often made, cookies that I’ve not enjoyed since she was here to make them some 15 years ago. I don’t think I can fully explain how excited I am to have finally stumbled upon the recipe! Apparently I’m not the only one to have missed them, as I recently had an inquiry from a childhood friend for the recipe. It was a welcome blast from the past, and reignited my determination to figure it out.

I have several of my mom’s baking cookbooks, and decided to start with the oatmeal-snickerdoodles from Maida Heatter’s Book of Great Cookies. I didn’t fully recall there being oats in mom’s cookies but decided to try them anyway, because…how could I not?!

Turns out that both the flavor and texture are what I have in memory—to me, they really might be the perfect cookie. Over the years I’ve baked a lot of snickerdoodles, some nutty and rich with brown butter, some light and tangy with cream of tartar, all of them soft, chewy, nice cookies…but pale in comparison to these. A few non-traditional snickerdoodle details: these have brown sugar in addition to granulated, a touch of vanilla, and no cream of tartar. Oh, and the oats of course! The oats get somewhat absorbed into the chewiness of the cookie (hence why I didn’t remember them) and I think they’re key to their textural magic.

Two more notes; there is a hefty amount of cinnamon going on—embrace it!—and also, the 400 F oven temp really is just right. If you worry that they might brown too much on the bottom, reduce the oven temp to 375 F or 350 F, three or so minutes after popping them in. Enjoy!

DSC_4209.jpg

Oatmeal Snickerdoodless

yields 3-4 dozen / adapted from Maida Heatter’s Book of Great Cookies

Ingredients

  • 2 c (240 g) all-purpose flour

  • 1 t baking soda

  • 1/2 t kosher salt

  • 1 t cinnamon

  • pinch cardamom

  • 1 1/2 c (135 g) old-fashioned or quick-cooking oats

  • 1 c (228 g) butter, room temp

  • 3/4 c (150 g) granulated sugar

  • 3/4 c (160 g) light brown sugar, packed

  • 2 eggs, room temp

  • 1 t vanilla

To finish

  • 2 T granulated sugar

  • 2 t cinnamon

Directions

  1. Whisk together the flour, baking soda, salt, and spices; next whisk in the oats. In the bowl of an electric mixer, cream the butter with both sugars. Add the eggs, one at a time, mixing well and scraping the bowl between each addition. Add the vanilla. Finally, add the dry ingredients and mix slowly before increasing the speed to medium-high until it’s just combined. Off the mixer, use a spatula to make sure the mixture is completely homogenous throughout.

  2. At this point, I recommend wrapping and refrigerating the dough overnight before baking (it can also be frozen). When ready to bake, preheat the oven to 400 F and line two baking pans with parchment.

  3. Toss 2 T granulated sugar with 2 t cinnamon in a small bowl. Roll the dough into 1.5” balls and toss in the cinnamon-sugar before placing on the lined baking sheet, 2” apart.

  4. Bake for 10-12 minutes, or until the cookies are a deep golden brown, the tops are crackled, and the sides feel substantially baked when pinched. I like to under-bake these slightly, letting the middles stay fairly light; they’ll sink a bit as they cool and create the chewiest center! Enjoy!

fullsizeoutput_1fdf.jpg

Decorated Sugar Cookies!

Here they are—straightforward, unapologetically kitsch, decorated sugar cookies! I always think that I’m baking these purely for the sakes of others and that I don’t actually want one, but somehow wind up having no trouble eating cookie for cookie with my toddler. They are so delicious and so simple—but also have much to offer for those easily hooked in fascination by how flavors/textures develop complexity over time.

The dough bakes off into beautifully light and crisp cookies, but after the glaze has time to set in (overnight or so), you wind up with the soft cookies of your dreams. So, best of both worlds really. The powdered sugar + milk glaze is also quite simple—no egg whites or tasteless spackle here! I like to keep it un-colored for the initial dip of each cookie so as to have a clean slate for decorating, and typically I’ll just add sprinkles and call it a day. This year however, I then divvied up the remaining glaze into bowls for coloring and piping, much to Lilly’s delight!

And now—if you’re feeling like extending the whole sugar cookie bonanza into taking as much time as possible, I recommend making your own food dye. Recipes for blue, red, and yellow can all be found here. (blue + yellow makes green) Once upon a time—July 2016—I spent several after hours in our little Sea Biscuit Bakery coaxing natural food dye recipes into Bon Appétit holiday issue condition. It was so exciting, so random, and so fun.

fullsizeoutput_1f5e.jpg

Glazed Sugar Cookies

Yields 2-3 dozen - adapted from Beyond Parsley (Junior League of Kansas City, Missouri 1984)

Cookies:

  • 1 1/2 cups (180 g) confectioners’ sugar

  • 1 cup (228 g; 2 sticks) unsalted butter, softened

  • 1 large egg, room temp

  • 1 t vanilla

  • 1/2 t almond extract

  • 2 1/2 cups (325 g) all-purpose flour

  • 1 t baking soda

  • 1 t cream of tartar

Glaze:

  • 2 1/2 cups (300 g) confectioners’ sugar

  • 1/3 cup (80 g) milk

  • assorted festive sprinkles and/or food coloring!

Directions

  1. Place the confectioners’ sugar and butter in the bowl of a stand mixer, and mix with the paddle attachment on medium speed until very light and fluffy, about 5-10 minutes. Scrape the sides of the bowl and mix again for a minute before turning the mixer down to the low speed and add the egg; mix until well incorporated.

  2. In a medium bowl, whisk together the flour, baking soda, and cream of tartar. Add to the mixing bowl and starting on lowest speed, mix until evenly incorporated.

  3. Divide the dough into two portions and wrap in plastic before chilling for at least 3 hours, or up to 2 days (or freeze for up to 1 month).

  4. When ready to roll/bake: take the chilled dough out of the refrigerator to temper a bit and preheat the oven to 350 F. Line 3-4 sheet pans with parchment paper.

  5. Sprinkle flour over countertop and roll the dough out to 1/8” thickness. Cut with cookie cutters and transfer cookies to prepared sheet pans, spacing 1” apart. Collect all dough scraps into a mound to knead together and re-roll.

  6. Bake cookies for 7-8 minutes until just golden around the edges and still pale in the middle. Let cool slightly and transfer to cooling rack to cool completely before decorating.

  7. When ready to decorate: stir the powdered sugar and milk together in a medium-small bowl. Dip the topside of each cookie into the icing before removing quickly and letting any extra icing drip off the sides; place on cooling rack to let any icing continue to drip away from the cookie edges.

  8. Decorate with sprinkles while the glaze is still wet; or let the glaze set before decorating with colored/piped glaze patterns!

DSC_3718.jpg

Chocolate Sticky Toffee Pudding!

I first made this dessert years ago, for a family Thanksgiving while I was in college. I was a beginner baker, and in fact this was the first occasion wherein I ever chopped dates. From then on, dates have had a hold on me and I will forever champion their degree and flavor of sweetness.

Unlike a layer cake or pie, sticky toffee pudding is the kind of dessert that doesn’t necessarily “show” well, but is invincibly superior as a whole, plated affair. As in every baking endeavor but perhaps especially here, balancing temperatures and timing is key—cozying up with warm, soft cake that’s dripping with hot toffee sauce and dolloped with cool unsweetened cream is winter evening perfection, I think.

Oh and! need to mention that while I’ve never met a sticky toffee pudding that I didn’t love, the chocolate addition here really makes this one particularly great. It’s the fudgiest cake imaginable without resembling a brownie, dense and yet nearly melts in your mouth. “Squidgy” is the right British term for it, meaning damp, spongy, and moist (in the best of ways!). I’ve also enjoyed it leftover at room temp days later—it seemed to have only gotten better!

2E8AC2C0-0BA5-4EAE-9FCB-12AACA590E6A-BADCC82E-F5CD-4820-9326-37A871526AEA.JPG

Chocolate Sticky Toffee Pudding

serves 9 - adapted from crave: a passion for chocolate by Maureen McKeon

cake

  • 1 1/2 ( g) chopped, pitted dates

  • 1 t baking soda

  • 114 g (1/2 c) unsalted butter, at room temperature

  • 133 g (2/3 c) granulated sugar

  • 2 large eggs, room temperature

  • 170 g (1 1/2 c) self-rising flour

  • 6 oz. (1 c) chopped dark bittersweet chocolate, melted and slightly cooled

toffee sauce

  • 114 g (1/2 c) unsalted butter

  • 140 g (2/3 c) dark brown sugar

  • 240 g (1 c) heavy cream

  • 3/4 t kosher salt

  • 1 t vanilla extract

  • splash of brandy

whipped heavy cream, unsweetened, to serve

  1. Preheat oven to 350 F. Butter a deep 8” or 9” square cake pan, and line the base with parchment paper.

  2. Put the dates in a medium/small saucepan and cover with 240 g (1 cup) water; bring to a boil and simmer for 3 minutes. Remove from heat and add the baking soda. Set aside to cool slightly.

  3. Using an electric mixer fitted with the paddle attachment, beat the butter and sugar together until pale and fluffy, about 5-10 minutes. Scrape the sides of the bowl down and add the eggs one at a time, beating well and scraping the sides/bottom of bowl between each addition.

  4. Gently fold in the sifted flour with a large spatula until just incorporated, followed by the date mixture. Finally stir in the melted, cooled chocolate, until just combined.

  5. Pour mixture into the prepared pan and bake for around 45 minutes, or until the cake shrinks back from the sides of the pan and the middle springs back slightly when pressed.

  6. Make the caramel sauce while the cake is baking: combine the butter, sugar, and cream in a small/medium saucepan and bring to a boil, stirring constantly. Reduce the heat and simmer for 5-10 minutes, or until caramel has thickened into a pourable but sturdy sauce. Remove from heat and add the salt, vanilla and brandy.

  7. Finally, cut the warm cake into squares, and serve with spoonfuls of the hot toffee sauce and unsweetened whipped cream! Enjoy!

DBE5C381-4E46-48FB-88E6-B6A3CFC1FBCC-46EAF46F-5721-4B77-B0BC-FFD78BABF14F.JPG
17C73C68-D2CB-4D95-8CAE-B9C899BACDFE-C24BE570-A1C9-464F-B21A-EC0933CD5166.JPG

Peanut butter pecan cookies!

There is really nothing like a good peanut butter cookie. It strikes as an almost savory indulgence—nutty, salty, chewy, crunchy, and most of all, balanced. I have always been a fervent fan of any treat or dish involving peanut butter, but most recently, my preference has taken a new spin, wherein I really just want a spoonful with a dash of date syrup. It is a completely unbelievable combination, and never again will I turn to honey when there is a deeper, more nuanced sweet note to enjoy alongside.

Anyway—this new snack inspired me to concoct a cookie! I used the peanut butter honey cookie from the latest Tartine cookbook (Elisabeth Prueitt) as a loose recipe guide, and may tweak it in the future to involve more date syrup or actual dates. But for the moment, these have really hit the spot. A few more notes—I have always added toasted pecans to my peanut butter cookies to compound the nutty component without being redundant, and add texture. I also used some buckwheat flour in addition to all-purpose. The result is a tender, delicately chewy center and crisp edges. Whether you’re a peanut butter fiend or not, these are hard to resist!

87488D23-2F8E-4DA1-8070-19653679CC2E-0A919DE4-8B74-463F-99E6-D2AC166A596C.JPG

Peanut Butter Pecan Cookies

yields two dozen 3” cookies

1C644D1B-FAB4-4BA4-943E-6C1023BD49A1-85831B48-1F58-4957-BFD2-CE67BE671447.JPG
  • 180 g (1 1/2 c) all-purpose flour

  • 90 g (3/4 c) buckwheat flour

  • 1 t baking powder

  • 1/2 t baking soda

  • 3/4 t kosher salt

  • 90 g (3/4 c) pecans, toasted & coarsely chopped

  • 200 g (1 c, lightly packed) dark brown sugar

  • 115 g (1/2 c) unsalted butter, at room temp

  • 115 g (scant 1/2 cup) peanut butter

  • 2 T date syrup

  • 1 large egg

  • 1 large egg yolk

  • 2 T milk

  • 1 T vanilla

  • additional 1/4 t salt + 50 g (1/4 c) granulated sugar, for coating

  1. Whisk together the dry ingredients in a medium bowl, then whisk in the cooled pecans.

  2. Cream together the butter, brown sugar, peanut butter, and date syrup until light and fluffy, about 5-10 minutes. Scrape down the bowl and add the egg, mix well before stopping and scraping the sides again, then add the yolk. Scrape down the sides and bottom of the bowl before mixing briefly mixing again, to ensure it’s evenly incorporated. Add the milk and vanilla.

  3. Add the dry ingredients and mix until combined; remove the bowl from the mixer and scrape the sides/bottom. Wrap the dough in plastic or transfer to an airtight container and refrigerate, preferably overnight or at least 2 hours (up to 2 days, freeze beyond that).

  4. When ready to bake, heat oven to 375 F and 2 baking sheets with parchment paper. Whisk together the additional salt and sugar in a small bowl.

  5. Scoop dough into 2” balls and toss in the sugar mixer before placing 2” apart on prepared baking sheets. Flatten with the tines of a fork in criss-cross pattern. Chill cookie sheet in either refrigerator or freezer for about 5 minutes before placing in middle rack of oven. Immediately turn down the oven to 350 F.

  6. Bake until edges begin to take on color, and the centers are still soft and just set, about 12 minutes, rotating pan halfway through. Let cool and enjoy!!

F70A991D-CD50-472A-828D-2D295E3C74F4-647BFC0D-B733-46D6-9EA9-FEA8BE42EC1C.JPG
0FDC0163-7576-4984-BDA1-A65467B3093C-BB3D7D51-C3CA-48C8-97E3-4BDBDB681130.JPG

Honey-Butternut Squash Muffins!

While I like pumpkin as much as anybody, I reserve my love for butternut. I love it for its delicate flavor, and the way it’s enhanced and furthered by my favorite ingredients, honey and cinnamon. In these muffins, the squash batter is barely spiced so that the honey & butternut really come through. They would be really delicious on their own with just a sprinkling of raw sugar…but if you’re feeling like you need a little extra, there is really no beating the coffee-cake effect of streusel + glaze!!

F8FAE046-14B7-42BA-96F3-BAD8F60063B4-932E8FDB-3C1D-4888-8F66-5C962EAD9A6A.JPG

Honey-Butternut Squash Muffins

yields 1 dozen

F0081DB9-90D0-4CDA-B4A0-27B5C0702385-E5BDFC5F-7CC8-4B5F-8C4B-FFC1A97674AB.jpg

Muffins:

  • 125 g (1/2 c + 1 T) unsalted butter, room temp

  • 100 g (1/2 c) sugar

  • 1 T honey

  • 1 egg, room temperature

  • 113 g (1/2 c) butternut squash puree

  • 1 60 g (1 1/3 c) all-purpose flour

  • 2 t baking powder

  • 1/2 t salt

  • pinch of cinnamon

  • 60 g (1/4 c) whole milk, room temp

Streusel:

  • (1 3/4 c) all-purpose flour

  • (3/4 c) light brown sugar

  • 1 1/4 t cinnamon

  • pinch of cardamom

  • 1 t salt

  • 60 g (1/2 c) lightly toasted slivered or sliced almonds

  • 171 g (3/4 c, 1.5 sticks) unsalted butter, cold & cubed

Glaze:

  • 113 g (1/2 c) confectioners’ sugar

  • 2 t honey

  • 1 T lukewarm water, plus more if needed

Directions:

  1. Preheat the oven to 350 F, and line a muffin tin with liners. Make the streusel: add all ingredients into the bowl of a stand mixer except the butter, and whisk by hand to break up the brown sugar. Add the cold, cubed butter and mix on low speed with the paddle attachment until the streusel begins to clump together. Transfer to another dish, cover, and keep refrigerated until ready to bake.

  2. Make the muffins: Wipe out the mixing bowl from any streusel remnants, and on medium speed, cream together the butter, sugar, and honey until extremely light and fluffy, about 5-10 minutes. Scrape down the bowl as needed to ensure it’s mixed evenly. Add the egg, and mix well, stopping to scrape down the bowl and mixing again to ensure homogeneity.

  3. Add 1/2 of the dry ingredients, mixing just until incorporated. Scrape down the sides of the bowl and on low speed, add the milk in a steady stream. Scrape down the sides again and add the remaining flour, being careful not to over-mix.

  4. Scoop about 1/4 c of muffin batter into each muffin liner, and top with a generous handful of streusel (scant 1/4 c streusel per muffin). Bake for about 25 minutes, or until muffin top feels relatively firm to the touch when pressed, or when a toothpick/skewer comes out with no crumbs attached. Take out and let cool before adding the glaze.

  5. Make the glaze: In a small bowl, whisk together all ingredients until a thick glaze forms, adding more confectioners’ sugar or water as necessary to achieve a consistency that will set atop the muffins but still drip a little bit down the sides (test by gauging how it drips off a spoon). Drizzle atop the muffins and let set a minute (or not!) before enjoying!

D56B5655-D8E4-4353-B5CD-41957B912B6E-824723C2-27A5-4BF4-B1E7-E462724BD21A.JPG
BB9523F8-6043-4820-A454-F26EDEFDA624-9B8919FD-4B9A-4C88-9EB2-A8AA308D4CCE.JPG

Nectarine-Blackberry Bakewell Tart!

Bakewell tart is really one of my favorites. The multi-textured components and balance of flavors make it particularly addicting, and it’s infinitely adaptable for whatever fruit is in season. It starts with a crisp, short pastry crust, then fruit topped with an almond frangipane, and finished with almonds and a light glaze.

This recipe is adapted from a cookbook I received for Christmas two years ago, The Farmhouse Cookbook by Sarah Mayor. It is a stunning collection of traditional yet modern British farmhouse recipes—fresh, seasonal, savory and sweet. I’ve made this particular recipe a few times, once as written with spiced pears and dark chocolate, and earlier this summer with white chocolate and strawberries. I would recommend making it with whatever fresh fruit you have on hand, asap!!

I like to make it in an array of shallow tart tins, but the recipe is enough for exactly one 9”, 2” deep tin. Make it however you’d like!

9F64CF2B-8E73-41CD-BBD7-1A5691BA0B57-5C99A63B-8811-4335-B479-A71068756B14.JPG

Bakewell Tart

Yields one 9”, 2” deep tart

Adapted from The Farmhouse Cookbook by Sarah Mayor

49674422-5B89-472E-BD92-A47F3536A903-6679907D-D546-452B-9D01-F6057CAE8E47.JPG

Crust:

  • scant 2 c (225 g) AP flour

  • pinch salt

  • 1/2 c (65 g) powdered sugar

  • generous 1/2 c (125 g) chilled butter, cubed

  • 1 egg yolk, beaten with 4 t ice-cold water

Filling:

  • 3/4 c (175 g) butter, room temperature

  • scant 1 c (175 g) sugar

  • 2 xl eggs, room temperature

  • 1/3 c (40 g) self-rising flour

  • 2 c (175 g) group almonds

  • 1 t vanilla extract

  • 3 ripe nectarines, peeled and sliced

  • 1 pint blackberries

  • 1/4 c (25 g) slivered almonds

Glaze:

  • 1/2 c + 2 T (75 g) powdered sugar

  • 1/4 t cinnamon

  • 3 t warm water

Directions:

  1. Make the crust: Add the flour, salt, and powdered sugar into a food processor. Add the butter and pulse until the mix is homogeneously sandy. Add the egg yolk mixture and pulse again until it begins to form a dough. Tip onto a lightly floured counter, and knead until smooth. Roll out to line a 9” round tart pan, 2” deep. (or, whatever shaped tart pans you’d like!). Prick the bottom all over with a fork, and freeze for 20 minutes (or for up to a week).

  2. Blind-bake the crust: Preheat the oven to 400 F. Line the tart shell with foil or parchment, and fill with pie weights. Bake for 15 minutes until the edges are lightly golden. Remove the weights and return to the oven for 5-7 minutes, or until the dough is crisp and golden brown throughout (don’t worry if the edges taken on a little bit of extra color). Set aside and let cool completely. Lower the oven temperature to 350 F.

  3. Make the filling: Beat the butter and sugar together in a stand mixer with the paddle attachment until light and fluffy. Beat in the eggs one at a time, mixing well after each addition. Scrape down the sides of the bowl and briefly mix again before adding the vanilla. By hand, stir in the flour and ground almonds.

  4. Arrange the nectarine slices and blackberries on the bottom of the tart shell. Spoon the almond mixture over the top and spread to the edges to cover the fruit completely (it should be nearly level with the top of the crust).

  5. Bake the tart for 20 minutes, then remove from oven and sprinkle the slivered almonds over the top. Return to the oven and bake for another 30 minutes, or until the top is golden brown and puffed around the edges, and set in the center. Let cool while making the glaze.

  6. Glaze: whisk together the powdered sugar, cinnamon, and water in a small bowl. Drizzle over the tart and let cool before slicing and serving!

75576DC5-32B9-4DE2-8A58-98F6202A8383-002763AA-1EF4-4211-9995-54008AA3DD5A.JPG
DB1F6128-27A3-41AF-95CC-C7ACF7836D76-45827E25-E75B-4B17-ACB0-7F9192A2A926.JPG
5D69F1CC-8F2F-48CC-A928-E54EA0A9DA44-240F5364-AA39-47D1-9C30-12ED88700EE6.JPG

Madeleines!

Here it is! A classic Madeleine recipe that recalls the experience we recently had in Paris—simplicity at its very best. The joy of madeleines goes beyond merely tasting good, and is rooted in their unique structure. The shell shape ensures a pleasantly crisp, browned top (or base, considering the pan), which gives way to a dense, soft, domed cake. (Dense in a good way—like a cake doughnut.) This dichotomy is what I find addicting about them; each bite has a different, rewarding ratio of crisp:soft.

Flavor-wise, they are pretty subtle, and it’s after the initial dramatic textural impression that the butter and vanilla really come through. Joining browned butter with vanilla bean creates a uniquely delicious flavor—and then the rum sends it over the top.

Of course, adding spices or citrus zest would be delicious. But honestly, if I want those flavors I’d just make muffins! The classic flavor is really not wanting for anything, and keeping the Madeleine straightforward preserves its magic.

0CE4409E-253F-4793-BED6-F6EBB30DB955.JPG

Classic Madeleines

9FE6F6F3-BDFD-40E6-9221-0575555FC587.JPG

Yields 20

Ingredients

200 g unsalted butter

1/2 vanilla bean pod

1-1/2 (heaping) cup (200 g) all-purpose flour

1 T baking powder

pinch salt

1/4 cup (60 g) milk, left at room temp for 1 hr

1-1/2 T (30 g) honey

1 t vanilla

2 T dark rum

3 eggs, room temperature

1/2 cup + 2 T (130 g) sugar

Begin with browning the butter: in a small saucepan over medium heat, melt the butter and let cook until it’s bubbling at a leisurely pace, smells nutty, and when swirled, bubbles give way to a golden-brown hued melted butter underneath. Once the desired shade of brown is achieved, immediately pour into a small heat-proof bowl to let cool, scraping the brown bits on the bottom of the pan if desired (the milk solids, lots of flavor!). Add the scraped vanilla bean seeds, followed by the entire pod, to the hot browned butter and stir around a bit so that the seeds will disperse. Set aside.

In a medium bowl, whisk together the flour, baking powder, and salt. In a liquid measuring cup, whisk together the milk, honey, vanilla, and rum. Set both aside.

In a medium-large bowl, whisk together the eggs and sugar until thick and opaque (can use stand mixer for this step); mixture will be ready when it drips off of a lifted whisk and forms a “ribbon” atop the rest of the mixture.

Fold the dry ingredients into the egg/sugar mixture, careful not to over-mix. Next fold in the wet ingredients, careful not to over-mix. Finally, pour in the browned butter (discard vanilla bean), and gently fold into the batter.

Transfer to large Tupperware container or tightly cover the bowl, and refrigerate overnight.

When ready to bake: preheat the oven to 400 F and generously butter the shells of a Madeleine pan. Scoop 2 tablespoon of the cold batter into each shell (don’t want to overfill!), and bake for 5 minutes before turning the oven back to 375 F. Continue baking for about 12 more minutes, or until the top of the Madeleines are just firm to the touch (they will still be quite pale), and the edges are darkened.

D173F075-EAA2-4E55-9E40-C830AB76B515.JPG
7A493DC9-BEC1-4D10-9B1C-D4594B725994.JPG

One more note—madeleines are most definitely at their best for just a few short hours after baking. Just glaze any leftovers if you’d like to counteract this.

Whisk together about 1/2-3/4 cup powdered sugar and the juice from 1/2 a lemon (or 2 T maple syrup + 1 T water)! Add more powdered sugar or liquid if needed—you want it to be thick enough to dry and set nicely, and not just be absorbed and then run off!

A8BC0FEB-3BD3-46D8-8B07-54973C8C1CE5.JPG

Blueberry Cakes!

April 1st! It seemed like March was never going to end. I’ve missed making cakes and frostings—assembling, decorating, delivering. I miss creating custom cakes for your celebrations.

Over the last few weeks of social distancing, staying home, etc., I’ve let go of the pressure to bake and post to social media. I’ve been in an alternating news / toddler induced fog. That said! I’ve made a few breakfast-type baked goods; ideal for snacking, ideal for freezing and microwaving. Casual, delicious, decadent with a scoop of ice cream.

Up first are these blueberry cakes! I baked them in a mini-cheesecake tin for whatever reason; definitely use a muffin tin & liners if you’re more inclined! I have a hodgepodge of various flours in my pantry, so decided to incorporate a few of them instead of leaning solely on all-purpose (you know, so I wouldn’t blow through it all before the next grocery run in 2 weeks). If you don’t already, I would really recommend getting some buckwheat and nut flours into your pantry—they really make a wonderful difference in taste and texture. And this time seems as good as any to experiment!

3CE64FE9-791D-4221-8D08-3050B285AB3F.JPG

If you’re not familiar with Wyman’s frozen Maine blueberries, well, I’ll just leave you with this tidbit. I ate an outrageous amount of fresh blueberries during the summer I was pregnant with Lilly in Maine. When Lilly was old enough to try her first blueberry (in KC at this point), she wanted nothing to do with them. I was like, huh, interesting, that’s too bad. But I also didn’t blame her—the fresh ones we got at the store here were bland at best. Flash forward to my finding Wyman’s, and suddenly we have an absolute fiend on our hands who wants nothing but frozen blueberries for breakfast, lunch, dinner, and in between. Her desire for these things is beyond—she’ll even chomp through them frozen. And while I’m dreaming of the day we can be in Maine eating them fresh, I am thrilled to have this delicious alternative.

(I find Wyman’s at Whole Foods. They’ve been well stocked, even through the last month; otherwise I don’t know if I’d have been able to blast this secret!)

FBA1436C-4D27-490F-A3AB-4E9DAD597B5F.JPG

Blueberry Cakes

Yields 12 miniature cakes or muffins

Ingredients

3/4 cup (90 g) all-purpose flour

3/4 cup (90 g) rye flour

1/4 cup (30 g) buckwheat flour

1/4 cup (30 g) ground hazelnuts (or almonds)

1 t baking powder

3/4 t baking soda

3/4 t salt

1 t cinnamon

1/2 t cardamom

3/4 cup (1-1/2 sticks, 170 g) unsalted butter, room temperature

1/2 c (100 g) granulated sugar

1/3 c (70 g) dark brown sugar, packed

2 large eggs, room temperature

1 t vanilla extract

3/4 cup (180 g) buttermilk

1/4 cup (60 g) creme fraiche

2 cups frozen blueberries

Raw sugar, to finish

Direction

Preheat oven to 350 F. Line a muffin tin with cupcake liners (or grease with butter) and set aside.

Whisk together the flours, baking powder, baking soda, salt, and spices in a medium bowl.

Using an electric mixer with the paddle attachment, cream together the butter and sugars on medium-high speed until light and fluffy, about 10 minutes. Scrape down the bowl and paddle and mix again.

Add the eggs, one at a time, scraping the bowl between each addition. Add the vanilla.

Add half of the dry ingredients followed by the buttermilk, scraping the bowl after each addition. Add the remaining half of the dry ingredients, and finally, fold in the creme fraiche with a spatula, being careful not to over-mix.

Use an ice cream/cookie scoop (should be about 1/4 cup capacity) to divide the batter into the prepared tin. Place a palm-full of frozen blueberries onto each, and repeat with another scoop of batter followed by another handful of blueberries. Sprinkle with sugar, and bake for about 15 minutes before rotating the tin, and bake for another 15-20 minutes. They will be done when the tops spring back when pressed lightly.

68423705-C9DD-4D17-B642-02FDC45ED5F4.JPG

Irish soda bread!

In the midst of uncertainty, I find it comforting to maintain a grip on what is certain.

While baking a loaf of Irish soda bread won’t cancel the confusion, chaos, and fear that’s gripped 2020, it might diffuse your boredom during quarantine, and will definitely provide a delicious breakfast/snack option for days. Days!

I went all in for a sweeter style soda bread here, a scone-like delight that pairs well with generous pats of butter and coffee. If you’d prefer a more savory bread, omit the dried fruit and spices. Also omit the egg, and increase the buttermilk amount to 2 cups (480 g).

Happy Saint Patrick’s Day!

85FC38D7-B08F-439C-B73B-0CAD63E2EFCD.JPG

Irish Soda Bread

Yields 1 12” loaf

3 c (360 g) self rising flour*

1 c (120 g) whole wheat flour

1/2 c (100 g) sugar

1/2 t baking soda

pinch of kosher salt

pinch of cinnamon &/or cardamom (optional)

1/4 c (4 T, 56 g) cold, cubed unsalted butter

3/4-1 c dried currants or raisins

1 egg

1 1/2 c (360 g) buttermilk**

*if self-rising flour is not on hand, substitute 3 cups all-purpose flour + 2 T baking powder

**if buttermilk is not on hand, use a blend of milk & creme fraiche, sour cream, or Greek yogurt

Preheat the oven to 375 F. Line a sheet pan with parchment paper.

Whisk the flours, sugar, baking soda, salt, and spices (if using).

Add the butter, and quickly blend into the dry ingredients with your fingertips—quickly so it stays cold! Once the butter is evenly incorporated (mixture will be quite dry), stir in the dried fruit.

Whisk together the egg and buttermilk in a small bowl or measuring cup, and add to the dry/butter mixture. Use a spatula to fold the dough together, taking care not to over-mix. (You’re basically making a huge scone here)

Once the dough has mostly come together, use your hands to fold any last dry pockets. With floured hands, pat the dough into a 7” circle on the prepared sheet pan. Use a large knife to cut a deep “X” into the top.

Bake for 45 minutes, or until browned. Let cool slightly before cutting into pieces!

Bread will keep, wrapped, for a few days. Alternatively, freeze it for future use.

92A87C13-630D-4BC5-8352-A0ABF67D0FAC.jpg
984D1850-4872-4B2A-BB6F-8F0AE3DC9486.JPG

festive jammy dodger / Linzer cookies!

These cookies are my undeniable favorites for this time of year; since I’m not really one for cookie decorating, I just love how easily festive these are with a few miniature cookie cutters on hand. I’ve made them during the last several holiday seasons, and have to seriously rush to get them wrapped up and delivered to neighbors and friends before my husband steals them all!

A note on the name—”jammy dodgers” are a traditional British cookie consisting of butter cookies sandwiched with raspberry jam, and are common with or without a dusting of powdered sugar. The Linzer cookie, on the other hand, is a traditional Austrian cookie that’s quite similar but for that it typically contains ground almonds in its dough. That said, I have run across notable recipe sources for them that *do not* contain almonds, and as they’re always finished with the sugar dusting, I thought it appropriate to make the association here. Whatever you call them, make them and enjoy the buttery, jammy goodness!

B1659774-B88C-4B49-910C-97E61C2B69C8.JPG

Festive Jammy Dodger / Linzer cookies

makes around 20

80CE6890-FB6C-4235-9A21-2F2CAF55118F.jpg

Cookies:

  • scant 2 cups (250 g) all-purpose flour

  • 3/4 cup + 1 T (110 g) confectioners’ sugar

  • 1/2 c + 6 T (200 g) unsalted butter, softened

  • 2 egg yolks

  • pinch of kosher salt

To finish:

  • 130 g raspberry jam

  • 2 T confectioners’ sugar, for sprinkling

Directions

  1. Place all cookie ingredients into a food processor, and pulse until it begins to come together. Once that happens, turn it to high speed until a completely homogenous dough is formed. Wrap it in plastic and refrigerate for at least 3 hours, up to 3 days.

  2. When ready to roll/bake: Take dough out of the fridge and let temper for about 1 hour; preheat the oven to 325 F and line cookie sheets with parchment paper.

  3. Lightly flour a counter surface and roll dough out to 1/8”-1/4” thickness. Use a 3” round biscuit cutter (or a cup with 3” diameter) to cut rounds. Re-roll scraps for more cookies. Use a 1” round cutter (I use small patterned cookie cutters) to cut out the centers of half of the rounds. Transfer the cookies without a cut-out to one prepared cookie sheet, and the ones with a cut-out to another.

  4. Bake for around 10 minutes, or until the cookies take on a golden color around the edges, rotating the pans halfway through baking. The cookies with the cut-out will take a bit less time than the ones without. When ready, remove from oven and slide the cookies (still on parchment paper) onto a cooling rack.

  5. Once they’re just cool enough to handle but still quite warm, flip the base cookies over and place 1 tablespoon of jam onto each. Spread the jam gently toward the edges, and return to a baking sheet and into the warm oven. Leave in for about 1 minute, to let the jam loosen up. Meanwhile, lightly dust the tops of the cookies with the cut-outs with 2 T powdered sugar.

  6. Take the base rounds out of the oven, and top with the finished tops. Let set for about 20 minutes and enjoy! The sandwiched cookies will become softer as they sit overnight, which I honestly love just as much as when they’re fresh and still crispy!

18122715-BE44-4350-9161-FCA0DFEC7E22.JPG
35CD4663-7851-4435-9355-EA9F542D899B.JPG

ginger cake + fudgy toffee frosting!

Kansas City finally got some snow this week, and I couldn’t have been more excited. I love watching it from the window, the opaque quality of light. I find it simultaneously calming and energizing; what to bake on a cozy snow day??

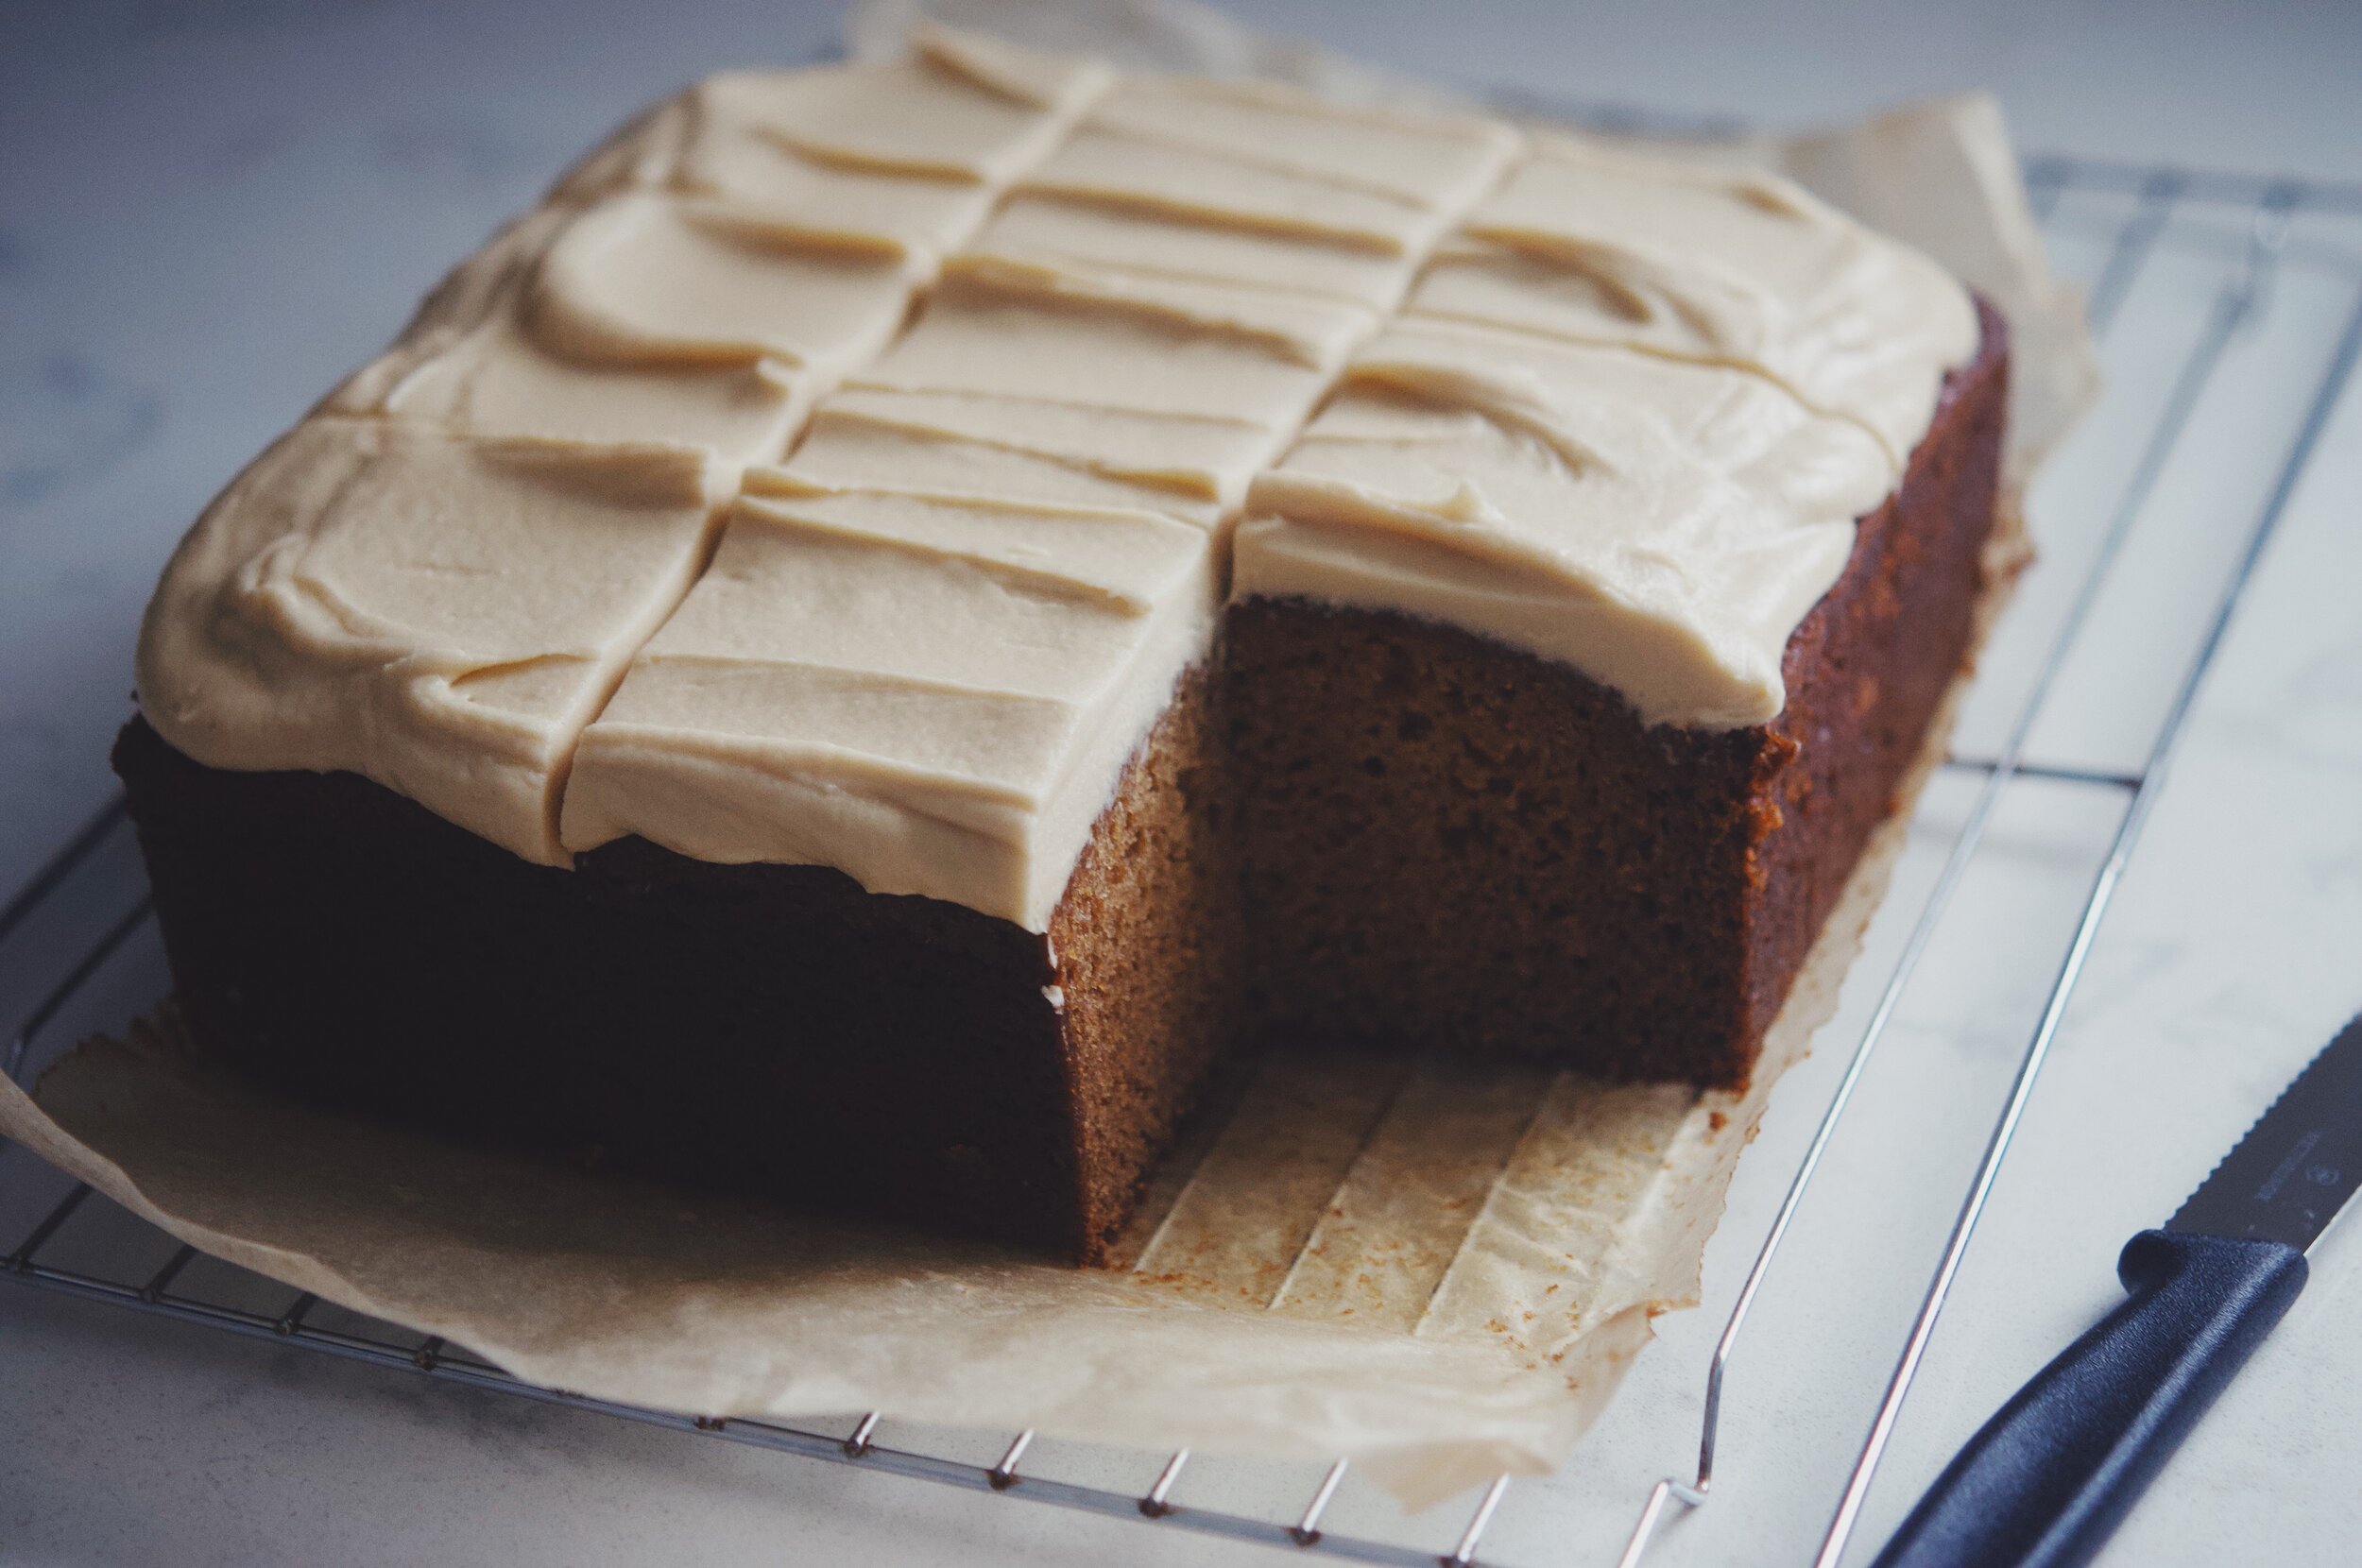
Ginger cake with fudgy toffee frosting, obviously! This cake is simplicity at its finest; soft and sweetly spiced cake blanketed with a luscious, buttery toffee frosting. A cheering accompaniment to coffee in the morning, and perhaps even better alongside a whiskey nightcap.

8D67C5F0-FA4B-4BE2-9422-F6E84EF33811.JPG

Ginger Cake + Fudgy Toffee Frosting

Yields one 9” square cake

Cake:

28C8F5F4-A5E2-41EA-8A0A-0FB1A7865208.JPG
  • scant 1 cup (225 g; 2 sticks) unsalted butter

  • 1 cup + 2 T (225 g) packed light or dark brown sugar

  • 1/2 cup (200 g) Lyle’s Golden Syrup (or honey, or light corn syrup)

  • 1 T molasses (preferably blackstrap)

  • 2 xl eggs

  • 1 1/4 cups (300 g) whole milk

  • 2 1/2 cups (325 g) all-purpose flour

  • 1/2 cup (50 g) almond flour

  • 1/2 t kosher salt

  • 2 t baking soda

  • 2 t ground ginger

Frosting:

  • generous 5 T (75 g) butter

  • 3/4 cup (180 g) heavy cream

  • 1/4 cup + 2 T (75 g) granulated sugar

  • 1/4 cup + 2 T (75 g) packed light brown sugar

  • 1/4 t kosher salt

Directions

  1. Preheat the oven to 325 F. Grease a 9” square cake pan and line with parchment paper.

  2. Put the butter, sugar, syrup, and molasses into a small pan and stir over low heat until melted; let cool slightly. Meanwhile, whisk together the milk and the eggs, then add to the butter/sugar mixture.

  3. Whisk the flour, almond flour, salt, baking soda, and ginger into a large mixing bowl and make a well in the center. Add the liquid mixture, and whisk until smooth.

  4. Pour the batter into the prepared pan and bake for about 1 hour, or until the middle is firm to the touch. Let cool in the pan for about 5 minutes, then turn out and let cool completely on a wire rack.

  5. Make the frosting: put the ingredients into a pan and stir over medium heat until melted. Bring to a boil a simmer for 5 minutes, stirring now and then. Remove from the heat and whisk until the mixture has thickened to a toffee sauce-like consistency. Allow to cool completely, beating occasionally to prevent it forming a sugary skin. Once cold, beat vigorously, until thick and spreadable.

  6. Spoon the frosting onto the top of the cake and spread out in an even layer before swirling with the blade of a knife. Let set before cutting into slices to serve.

adapted from The Farmhouse Cookbook by Sarah Mayor

5872348D-0E88-4C0B-9575-0D3D54DF7B91.JPG

rye coffee cakes with fruit & nut variations!

For whatever the reason, my mind tends to skip over coffee cakes when I think of breakfast pastries. I suppose I like goods that come with a host of variables, flavor options, etc., and messing with the classic butter, sugar, & cinnamon composition seems silly, so it generally just doesn’t enter my thoughts at all....

…until I was sick a few weeks ago, and “taking it easy” for me means spontaneous baking. These two coffee cakes were the result, one with pears and hazelnuts and the other with apples and walnuts, and I just loved them. The flavors and textures come together to yield a really comforting pastry, cozy but also intriguing. I measure deliciousness by how difficult it is to walk away without another bite, and these passed that test all too well.

I was so excited about them, and then was distraught upon realizing that I was in no shape to be out and about sharing food with anyone—except my toddler, the origin of my cold I am sure! Let’s just say I’m looking forward to the rainy day that I pull these out of the freezer for a play date!

B5F826AA-FFA7-457A-B099-CF245257C20B.JPG

Rye Coffee Cakes

Yields one 9” round coffee cake or two 6” round coffee cakes

Streusel:

  • 1 cup (130 g) all-purpose flour

  • 3/4 cup (90 g) rye flour

  • 3/4 cup (160 g) light brown sugar

  • 1 (generous) t kosher salt

  • 1 t cinnamon

  • 1/8 t cardamom

  • 3/4 cup (1 1/2 sticks; 170 g) unsalted butter, cold & cubed

  • 1 cup (120 g) roughly chopped pecans, walnuts, or hazelnuts (peeled)

Cake:

  • 1 cup (130 g) all-purpose flour

  • 1 cup (120 g) rye flour

  • 1 t baking powder

  • 3/4 t baking soda

  • 3/4 t kosher salt

  • 1 t cinnamon

  • 1/2 t cardamom

  • 3/4 cup (1.5 sticks; 171 g) unsalted butter, room temperature

  • 1/2 cup (100 g) granulated sugar

  • 1/3 cup, packed (70 g) light brown sugar

  • 2 eggs, room temperature

  • 1 t vanilla extract

  • 3/4 cup (180 g) buttermilk, room temperature

  • 1/4 cup (60 g) creme fraiche

  • 1 large apple (I used Honeycrisp) or 2 medium pears, cut into 1/2”-1” cubes

Directions:

pre-bake!

pre-bake!

  1. Make the streusel: In a small/medium bowl, whisk together all ingredients aside from the butter. Once thoroughly combined, use your fingertips to work the cold/cubed butter into the mixture until it comes together in small/medium clumps. Add/incorporate the nuts and refrigerate until needed.

  2. Make the cake: Pre-heat the oven to 350 F, and butter one 9” cake pan or two 6” cake pans and line with parchment. Whisk together the dry ingredients in a medium bowl and set aside. Add the vanilla extract to the measured & tempering buttermilk.

  3. In a the bowl of a stand mixer with the paddle attachment, combine the sugars and butter and mix until quite light and fluffy, about 10 minutes. Add the eggs, one at a time, beating thoroughly after each addition.

  4. Add the dry ingredients in three additions alternating with the buttermilk/vanilla, stopping the mixer as soon as each addition is nearly incorporated (to avoid over-mixing), and scraping the sides after each addition. Finally, using a large spatula, fold the creme fraiche into the batter.

  5. Pour into the prepared pan(s), and top with the diced fruit. Sprinkle with the nut streusel and bake for about 1.25 hours (about 45 minutes to an hour for the 6” cakes), or until a skewer inserted into the middle comes out clean, and the top middle of the cake feels firm to the touch. Set on a cooling rack until cool enough to handle safely with a towel or oven mitt, and invert onto a plate (so it catches the streusel) before inverting again, either back to the cooling rack or serving plate. Enjoy!

70C71340-7077-4610-A9F6-B91DBC45EFB6.JPG
77063BAB-ADBF-457F-8438-06150529664D.JPG
75756E09-2791-4C9D-ACF7-C9E65FB33BEA.JPG
DEB8FF01-CC68-4942-8DA5-2BA912D54C15.JPG

triple chocolate brownies!

I almost titled this post “Airbnb Brownies”, as that is where I made them last week in Camden, Maine! We decided that the year and a half that we’d been away was too long, and were thrilled for the chance to visit friends and so many of our favorite places. So much good food—!

The highlight of the trip was catching up with friends, and with our two year old in tow, being able to invite people over to our Airbnb after her bedtime made it all the more possible. Upon arrival, I checked out the pantry…low and behold were most of the ingredients for brownies! All I needed from the store were eggs, butter, and a bit more chocolate, and then we were set. They come together unfussily in one pan, and are easily made with drink in hand, deep into conversation for a decadent late night snack.

To me, these are the ultimate brownies. They are fudgy but not overly gooey; I love the defined structure and fine crackly top. Obviously there is nothing like a warm brownie barely cooled from the oven, but I also love them in the days to come, when the chocolate chunks set and provide a delicious textural contrast to the rest.

EB80F5A6-F347-499B-A4BF-6EC944945955.JPG

Triple Chocolate Brownies

Adapted from Epicurious - yields 12 ( or 16 small-) brownies

Ingredients

  • 3 ounces fine-quality bittersweet chocolate, chopped

  • 1 ounces unsweetened chocolate, chopped

  • 6 T (85 g) unsalted butter

  • 3/4 cup (150 g) sugar

  • 1 teaspoons vanilla

  • 2 large eggs, room temperature

  • generous 1/2 tea spoon salt

  • 1/2 cup (65 g) all-purpose flour

  • 3 oz. milk chocolate, chopped

Directions

  1. Butter an 8x8” square baking pan and line with parchment paper, allowing overhang on two opposing sides; lightly butter the parchment. Preheat the oven to 350 F.

  2. In a medium saucepan, melt together the chocolate and butter, stirring constantly to keep the chocolate from overheating/burning, and removing from heat as soon as the mixture is mostly liquid (there may be a few pieces of stubborn unmelted chocolate, but rest assured they will melt in time! the important thing is not to over-do it.).* Set aside to cool for around 5-10 minutes.

  3. Whisk in the sugar, followed by the eggs, one at a time, whisking well after each addition. Add the vanilla. Using a spatula, gently fold the salt and flour into the mixture, and when it’s about 3/4 of the way mixed in, add the chopped milk chocolate before completing.

  4. Pour the batter into the prepared baking pan, and bake for about 20-25 minutes, or until fairly firm to the touch in the center. You can also insert a tester or toothpick; brownies will be done when no crumbs adhere.

  5. Let cool and cut into desired size bars, and enjoy!

*You may also melt the chocolate and butter in a double boiler, or a medium bowl set over a pot of simmering water. I recommend this if you’d rather not risk the chocolate overheating or need to multitask!

Rockport, Maine

Rockport, Maine

Chocolate is her favorite!

Chocolate is her favorite!

hazelnut, honey & pear scones!

I first made these exactly two years ago, in Maine while waiting for Lilly to arrive. I was loving the fall weather and scurrying to pack our freezer with as many wholesome/delicious snacks as possible…these were at the top of that list!

These are inspired by the sugar-free oatmeal maple scones from Flour Bakery in Boston. When I’d first started there in 2011(!), I was blown away by the depth of flavor that came from using a natural sugar source instead of processed. I’ve craved those scones ever since, and have tweaked that recipe here, using honey instead of maple syrup and adding ground hazelnuts, toasted chopped hazelnuts, and pears. And cardamom (it’s true—I am eager to add it to everything).

As with all scone recipes I know and love, I am torn between wanting these with a sprinkle of raw sugar on top, as well as with a glaze. No wrong answer here, and the directions cover both!

2B9F463F-515F-42F6-A0E2-B925A29823E7.JPG

Hazelnut, Honey & Pear Scones

4E7503F8-A91D-4590-BD20-E0582A6A09F6.JPG

Ingredients

  • 1 1/2 c (210 g) AP or whole-wheat flour

  • 2/3 c (65 g) ground hazelnuts (I used Bob’s Red Mill)

  • 1 1/2 t baking powder

  • 1/4 t baking soda

  • 1 t kosher salt

  • 1 t cardamom

  • 3/4 c (65 g) old-fashioned rolled oats

  • 1/2 c (50 g) hazelnuts, toasted and chopped

  • 1/2 c (114 g) cold unsalted butter, cut into 8 pieces

  • 1 pear, ripe but firm, diced into 1/4-1/2 inch pieces

  • 1 cold egg

  • scant 1/2 c (150 g) honey

  • 1/3 c (80 g) cold heavy cream

Directions

  1. Line a baking sheet with parchment paper. I like to freeze the unbaked scones and bake off as needed, so I use a small baking sheet that will fit in the freezer. Otherwise, if baking immediately, use a standard sized pan that will allow for the scones to bake 2-3 centimeters apart.

  2. Whisk together the flour, ground hazelnuts, baking powder, baking soda, salt, and cardamom in the bowl of a stand mixer. Add the oats and toasted/chopped hazelnuts, whisk to combine. Using the paddle attachment and with the mixer on low speed, add the butter and mix until the butter begins to break down and incorporate–about 1 minute (some blueberry sized pieces should still be visible). Scatter the pear dices over the mixture and mix on low until just incorporated.

  3. Whisk together the egg and honey in a small bowl, and gradually whisk in the heavy cream.  Make sure the honey is well incorporated–it’ll want to stick to the bottom of the bowl. On low speed, pour the wet mixture into the dry, and beat for about 10 seconds. Stop the mixer and make sure to scrape all of the wet ingredients into the bowl before returning the mixer to medium speed for about 20 seconds, or until it’s started to come together. It’s important not to overmix the dough, so by all means feel free to take exacting control and finish it yourself with a spatula!

  4. Using a standard muffin scoop or else a 1/2 measuring cup, scoop the dough into rounded portions onto the parchment lined baking sheet, 2-3 inches apart. Put the baking sheet into the refrigerator to rest/chill for 15 minutes, and heat the oven to 350 F.  (Alternatively, scoop the scones closer together on a baking sheet, wrap with plastic, and stash away in the freezer!)

  5. When ready, bake for about 30 minutes, or until the scones are lightly browned on the top, and when “squeezed” (lightly pressed around the sides with your middle finger and thumb), give a bit of resistance (somewhat firm, not doughy).

  6. While scones are baking, whisk up the glaze, if desired. Whisk together 1 cup (140 g) confectioners’ sugar, 2 T honey, and 2 T water all ingredients together, adding more water if glaze seems too thick, adding more confectioners’ sugar if glaze seems too runny. Brush on top of the hot scones when they come out of the oven, and wait about 15 minutes before diving in!

F9DF4A1F-716D-4FEE-BB3A-FD66CBF150FE.JPG

brown-butter honey pie!

This pie is one that I’ve come back to again and again; I love it for its intense flavor and simple aesthetics. It’s unapologetically sweet yet balanced—the browned butter and a bit of sea salt round out the honey flavor, and the custard pairs so nicely with a flakey crust.

In Maine, I really enjoyed using the QI Chai honey from Zen Bear Honey Teas with this recipe, and have sadly just run out of my last jar…that is to say, I’d absolutely recommend experimenting with different honeys that you come across! And, if honey is a bit too much for your taste, you can swap out up to 1/2 the amount called for with Lyle’s Golden syrup…this is in fact my preference!

Last note; this pie is really lovely on its own with a dollop of whipped cream or mascarpone, but adding a fruit compote alongside would be nice as well!

13C51D5A-CBFD-43B2-9611-A1671771030A.JPG

Brown Butter Honey Pie

3DBB46F3-C657-47CE-93FA-A0CDFF320CB5.JPG

yields enough for 2 9” pies -or- 1 generously filled 9” pie + 1 6 oz pudding ramekin

  • Pie crust(s), blind-baked & cooled

  • 3/4 c (170 g) unsalted butter

  • 3/4 c (255 g) honey (or…swap in up to 1/2 c Lyle’s Golden Syrup)

  • 1 vanilla bean’s seeds

  • 1 c (200 g) sugar

  • 2 T (15 g) AP flour

  • 1 t salt

  • 5 eggs

  • 1 c (240 g) heavy cream

  • Flaky sea salt for topping

Directions:

  1. Once your pie shell(s) are blind-baked and cooled, make the filling:

  2. Start with browning the butter—melt the butter in a saucepan over medium heat and allow to simmer and foam. As the foam subsides, watch for it to turn golden and then brown, about 8-10 minutes. Once it turns brown, it’s moments away from burning–so, quickly take off the heat, add the honey and vanilla seeds, and stir until it’s dissolved. Let cool about 10 minutes.

  3. Meanwhile, whisk together the sugar, flour, and salt in a medium/large bowl. Add the brown butter mixture and whisk until thoroughly combined. Add the eggs, one at a time, whisking well after each addition. Whisk in the heavy cream and pour into the prepared pie crusts (or crust + ramekin).  Bake for 60-75 minutes, rotating the pie halfway through baking. It’ll be done when it turns deep golden brown on the top; it’ll puff up and set around the edges but will still wobble in the center. Top with flakey sea salt and let cool to room temperature before cutting into it; serve with dollop of whipped cream or mascarpone, fresh fruit or compote, etc…! Store any leftovers in refrigerator!

5B957B9B-56EB-4EE1-BD3F-C36EFF47470D.JPG

pie crust! (pâte brisée)

A pie is only as good as its crust, and I really, really love this one! Not only does the texture bake into crisp flakey-ness, but the taste is buttery, salty, and perfectly complements any sweet filling you could toss into it.

I use a bit of rye flour in addition to all-purpose, because I like the faint earthiness and softness that it adds, but feel free to use 100% all-purpose if that’s what’s on hand or is your preference!

This recipe yields a generous amount, enough for three 9” pie shells or two 9” shells + one lattice/cover. I like to go ahead and line two tins, and then use the combined leftover dough as lattice or as a free-form galette!

1BA6F8FD-8F3A-437A-A286-F52417AED3DA.JPG
photo 1 - mixing stage - before the addition of the yolk/cream mixture, sandy with larger chunks of butter intact

photo 1 - mixing stage - before the addition of the yolk/cream mixture, sandy with larger chunks of butter intact

photo 2 - dough turned out of the mixing bowl, pre-kneading/fraisage

photo 2 - dough turned out of the mixing bowl, pre-kneading/fraisage

pâte brisée

  • 3 c (400 g) AP

  • 1 c (100 g) dark rye flour

  • 2 T (25 g) sugar

  • 2 1/4 t kosher salt

  • 2 c (454 g) unsalted butter, cold and cubed

  • 4 egg yolks

  • 1/4 c + 2 T (90 g) cold heavy cream

Whisk the flours, sugar, and salt together in the bowl of an electric mixer. Add the cold cubes of butter, and mix with the paddle attachment until the butter pieces have broken down a bit, about 3-4 minutes. Make sure you start the mixer on low, and I’d strongly recommend loosely wrapping a kitchen towel around the top of your mixer so the flour won’t escape! After 2 minutes, about half way through this initial mixing period, bump the mixer to medium speed.

Stop the mixer once the dough is shaggy, and larger chunks of butter are still visible (photo 1). Whisk together the cold egg yolks and the heavy cream, and pour all at once into the pie dough. Resume mixing on low/medium speed until the dough has barely come together.

Dump the dough onto a counter top (photo 2), and here’s the fun part! And where the French title is relevant—pâte brisée literally translates to “broken dough”, . Gather the dough (there may still be looser parts that don’t want to hold together, just smush them into the pile as best you can) into a mound and, using the heel of your palm, push down the away-facing side of the dough toward the table (photo 3). You should be able to see any larger remaining bits of butter streak through the dough during this motion. Repeat until the mound is uniformly together, gather it up in a rectangle, and divide into halves (photo 4). Wrap each half in plastic wrap, and refrigerate overnight before rolling.

photo 3 - fraisage!

photo 3 - fraisage!

photo 4 - ready to wrap & chill.

photo 4 - ready to wrap & chill.

D3018EE2-A9EF-46D8-A97C-58B05C64B95C.JPG

Rolling: Before rolling, let the chilled dough sit at room temp for just shy of 10 minutes. Sprinkle your work surface with flour, with more on hand to use as needed. Roll the dough out to 1/8” - 1/4” thinness, and line a 9” pie tin. Trim the edges so that there’s an even 1” overhang (save the scraps), and crimp. As far as crimping goes, I use my right thumb + index finger and left forefinger to push it into a triangular pattern. Prick the bottom of the shell evenly with a fork, and pop the shell in the freezer. Repeat with the second mound of dough.

Compile the overhang scraps together and work into a round, and chill 6 hours (or overnight) before rolling. I like to roll it into a large circle, and freeze it lying flat on a large cutting board—this way it’s rolled and ready to use for a galette, or for cutting into lattice strips.

Blind Bake: Heat the oven to 400 F. Line the frozen pie shell with tin foil, and generously fill with pie weights (or dry beans). I use tin foil because I like being able to gently fold it over the crimped edges, if the edges start getting too dark before the bottom can cook. Immediately place in oven on the lowest rack. Bake for about 15 minutes, until the edges have taken on a hint of color. Take out of oven and let rest, pie weights in tact, for 10 minutes. Reduce the oven to 350 F. Remove the weights and tin foil, and bake again on the lowest rack for 15-20 minutes, or until the bottom of the crust is baked—it should be dry, and a golden color.

If you’re making a pie that will not undergo additional baking, and the finished filling will be added directly, it’s imperative that the crust is well baked, and the base should evenly take on a golden brown color (if the edges start getting too dark, you can gently cover them with tin foil).

If you’re making a pie that will undergo additional baking, it’s all the more important to keep an eye on the edges, to make sure they’re not getting too much color. Again, gently covering them in tin foil works well to protect, but also keep in mind that you can be a little more relaxed about the base being baked through, since it’ll have more time in the oven and you don’t want the edges to burn.

post-weight removal, ready for final blind bake round. note the edges are pale and bottom is not baked through/colored

post-weight removal, ready for final blind bake round. note the edges are pale and bottom is not baked through/colored

completed blind bake and ready for filling!

completed blind bake and ready for filling!