Buckwheat Pistachio, Apricot & White Chocolate Cookies!

What is it about spring and pistachios?! It must be the green—they hardly cross my mind until about March, and then I find them (and color!) especially irresistible. Using salted, roasted pistachios in these cookies balances the jammy sweetness of Turkish apricots and mellow white chocolate, an intriguing flavor and texture combination bound together by a chewy buckwheat oatmeal dough. There’s something wholesome about them, which means that they’re slightly dangerous to have around…they seem appropriate for breakfast, they’re the perfect afternoon pick-me-up, and there’s so much going on that you always need one more bite. Enjoy!

DSC_4055.jpg

Buckwheat Pistachio, Apricot, & White Chocolate Cookies

yields around 1.5 dozen

Ingredients:

  • 100 g (generous 3/4 cup) buckwheat flour

  • 3/4 t kosher salt

  • 1/4 t baking soda

  • 25 g (1/4 cup) tapioca flour/starch

  • 1/8 t cinnamon

  • pinch of cardamom

  • 80 g (1/4 c + 2 T) light brown sugar

  • 50 g (1/4 c) granulated sugar

  • 90 g (1 cup) old-fashioned rolled oats

  • 4 oz. white chocolate, coarsely chopped

  • 60 g (1/2 c) roasted, salted pistachios, coarsely chopped

  • 65 g (1/2 c) quartered Turkish dried apricots*

  • 114 g (1 stick, 1/2 c) unsalted butter, melted & cooled

  • 1 egg

  • 1 t vanilla extract

*Turkish apricots are unsulphured, which means they’re darker, softer, and sweeter than the brighter, more “tart” and easier-to-find California variety.

Directions:

  1. Whisk together the buckwheat flour, salt, baking soda, tapioca flour, brown sugar, and sugar together in a medium-large bowl. Add the sugar and whisk to combine, manually breaking down chunks of brown sugar if necessary. Whisk in the oats. Finally add the white chocolate, pistachios, and apricots and stir with a spatula to disperse evenly throughout the dry mixture.

  2. In a small bowl, whisk together the melted butter, egg, and vanilla extract. Pour into the dry mixture, and stir until a homogenous dough comes together. Wrap the dough in plastic wrap and refrigerate (or freeze) for about 2 hours, or up to a few days.

  3. When ready to bake, preheat the oven to 375 F and line baking sheets with parchment paper. Scoop the dough into balls about 1.5” in diameter and set 2” apart on the prepared sheet. Flatten slightly with your palm, and bake for about 10 minutes, or until the tops are puffed and the edges are golden.

DSC_3489.jpg

Almond-Anise Butter Cookies!

I feel as though I start every post with superlatives, favorite this and best that, and while I’ve tried to come up with a different way to introduce these…I cannot! These almond-anise cookies are festive, packed with flavor, and fun to make and to eat. It’s a definite favorite cookie of mine, and also the one that’s received the most praise from cookie recipients this year.

As you can tell, these are a spin on Mexican wedding cookies / Russian tea cakes. Instead of pecans or walnuts, I use almonds and add ground anise seeds. The flavors work wonderfully with the structure of this cookie, and I don’t know if I’ll ever make it the traditional ways again!

I typically refrigerate or freeze any and all cookie dough that I make, and then scoop/bake off however much I need at a given time. Since the butter proportion in this dough is high, however, I recommend making and baking right away, or portioning/shaping the cookies before refrigerating/freezing so you don’t wind up chipping away at a cold block of dough when you’re ready to bake!

DSC_4297.jpg

Almond-Anise Butter Cookies

yields about 3 dozen

Ingredients

  • 1 1/2 c (230 g) all-purpose flour

  • 1/2 t kosher salt

  • 1 t anise seeds, finely ground

  • 1 1/4 c (140 g) raw / blanched almonds, toasted & cooled

  • 1/4 c + 1 T (56 g) granulated sugar

  • 3/4 c (1 1/2 sticks; 171 g) unsalted butter, room temp

  • 1 t vanilla

  • 2 c (230 g) powdered sugar, for coating

Directions

  1. Whisk together the flour, salt, and ground anise seeds in a medium bowl and set aside.

  2. Process the almonds and 1 T sugar in a food processor until the almonds are finely chopped. (careful not to turn it into butter, though!) Set aside.

  3. With the paddle attachment, cream the remaining 1/4 c sugar, butter, and vanilla in the bowl of an electric mixer until light and fluffy, scraping down sides of bowl as needed.

  4. Add the flour mixture into the butter mixture, mixing slowly until the dough has almost come together. Add the almonds and gradually increase the speed until the mixture is evenly combined. Do not over-mix—remove bowl from mixer and target any spots that need incorporating by hand if need be!

  5. The high butter content renders this dough best to work with at room temp, so roll and bake the cookies right away or roll them to store in the refrigerator or freezer to bake off later.

  6. If baking right away—heat oven to 325 F, and line baking sheets with parchment paper. Roll the dough into 1” balls and place about an inch apart on the prepared baking sheets. Flatten them slightly with your palm. Bake the cookies for about 22-27 minutes (about 30-34 if baking from refrigerator, 35 if baking from frozen), until the bottoms are golden, and the tops are firm when pressed. You want these to be totally baked through/dried out—they need to be light and crisp! Take measures to ensure even baking—rotate the pan mid-bake, and if you’re baking multiple sheets at a time, switch them between the racks. While cookies are baking, place powdered sugar in a medium/small bowl.

  7. Once cookies out of the oven, transfer to a cooling rack. As soon as you can (I do this pretty much right away), toss each cookie in the powdered sugar to coat completely, and place back on cooling rack. Let cool & enjoy!!

fullsizeoutput_1ffa.jpg

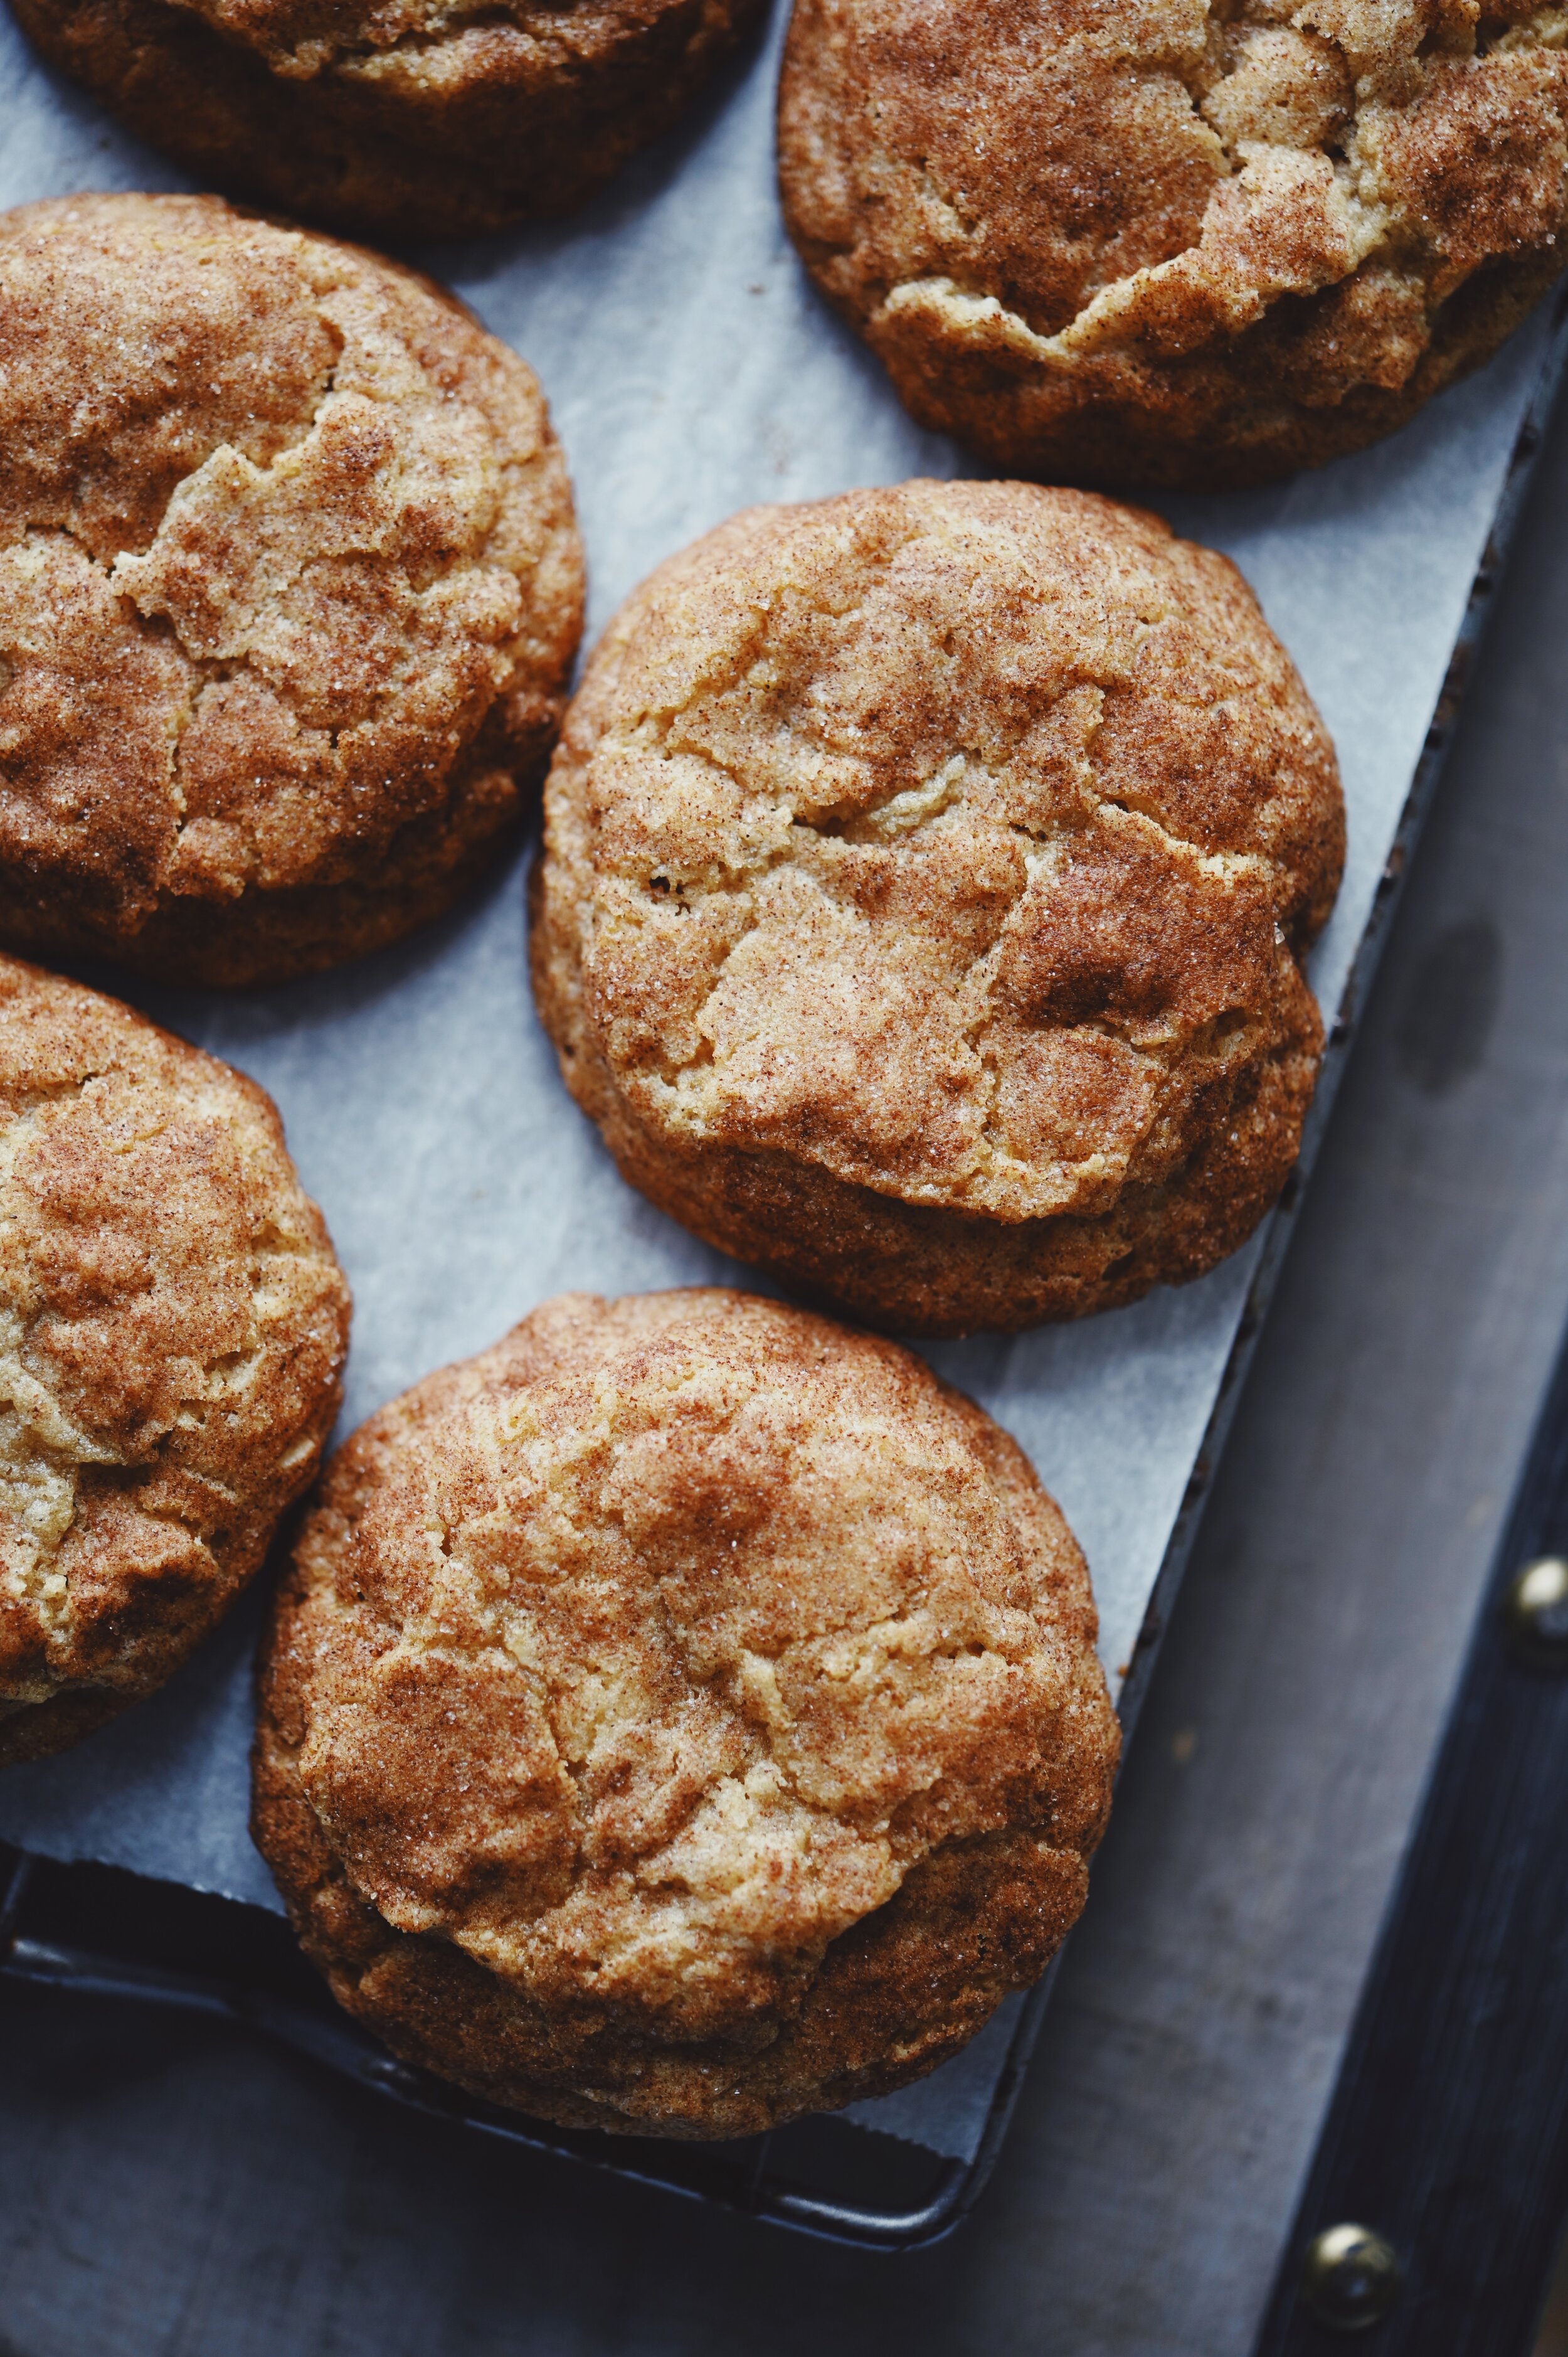
Oatmeal-Snickerdoodles!

These are the snickerdoodles that my mom often made, cookies that I’ve not enjoyed since she was here to make them some 15 years ago. I don’t think I can fully explain how excited I am to have finally stumbled upon the recipe! Apparently I’m not the only one to have missed them, as I recently had an inquiry from a childhood friend for the recipe. It was a welcome blast from the past, and reignited my determination to figure it out.

I have several of my mom’s baking cookbooks, and decided to start with the oatmeal-snickerdoodles from Maida Heatter’s Book of Great Cookies. I didn’t fully recall there being oats in mom’s cookies but decided to try them anyway, because…how could I not?!

Turns out that both the flavor and texture are what I have in memory—to me, they really might be the perfect cookie. Over the years I’ve baked a lot of snickerdoodles, some nutty and rich with brown butter, some light and tangy with cream of tartar, all of them soft, chewy, nice cookies…but pale in comparison to these. A few non-traditional snickerdoodle details: these have brown sugar in addition to granulated, a touch of vanilla, and no cream of tartar. Oh, and the oats of course! The oats get somewhat absorbed into the chewiness of the cookie (hence why I didn’t remember them) and I think they’re key to their textural magic.

Two more notes; there is a hefty amount of cinnamon going on—embrace it!—and also, the 400 F oven temp really is just right. If you worry that they might brown too much on the bottom, reduce the oven temp to 375 F or 350 F, three or so minutes after popping them in. Enjoy!

DSC_4209.jpg

Oatmeal Snickerdoodless

yields 3-4 dozen / adapted from Maida Heatter’s Book of Great Cookies

Ingredients

  • 2 c (240 g) all-purpose flour

  • 1 t baking soda

  • 1/2 t kosher salt

  • 1 t cinnamon

  • pinch cardamom

  • 1 1/2 c (135 g) old-fashioned or quick-cooking oats

  • 1 c (228 g) butter, room temp

  • 3/4 c (150 g) granulated sugar

  • 3/4 c (160 g) light brown sugar, packed

  • 2 eggs, room temp

  • 1 t vanilla

To finish

  • 2 T granulated sugar

  • 2 t cinnamon

Directions

  1. Whisk together the flour, baking soda, salt, and spices; next whisk in the oats. In the bowl of an electric mixer, cream the butter with both sugars. Add the eggs, one at a time, mixing well and scraping the bowl between each addition. Add the vanilla. Finally, add the dry ingredients and mix slowly before increasing the speed to medium-high until it’s just combined. Off the mixer, use a spatula to make sure the mixture is completely homogenous throughout.

  2. At this point, I recommend wrapping and refrigerating the dough overnight before baking (it can also be frozen). When ready to bake, preheat the oven to 400 F and line two baking pans with parchment.

  3. Toss 2 T granulated sugar with 2 t cinnamon in a small bowl. Roll the dough into 1.5” balls and toss in the cinnamon-sugar before placing on the lined baking sheet, 2” apart.

  4. Bake for 10-12 minutes, or until the cookies are a deep golden brown, the tops are crackled, and the sides feel substantially baked when pinched. I like to under-bake these slightly, letting the middles stay fairly light; they’ll sink a bit as they cool and create the chewiest center! Enjoy!

fullsizeoutput_1fdf.jpg

festive jammy dodger / Linzer cookies!

These cookies are my undeniable favorites for this time of year; since I’m not really one for cookie decorating, I just love how easily festive these are with a few miniature cookie cutters on hand. I’ve made them during the last several holiday seasons, and have to seriously rush to get them wrapped up and delivered to neighbors and friends before my husband steals them all!

A note on the name—”jammy dodgers” are a traditional British cookie consisting of butter cookies sandwiched with raspberry jam, and are common with or without a dusting of powdered sugar. The Linzer cookie, on the other hand, is a traditional Austrian cookie that’s quite similar but for that it typically contains ground almonds in its dough. That said, I have run across notable recipe sources for them that *do not* contain almonds, and as they’re always finished with the sugar dusting, I thought it appropriate to make the association here. Whatever you call them, make them and enjoy the buttery, jammy goodness!

B1659774-B88C-4B49-910C-97E61C2B69C8.JPG

Festive Jammy Dodger / Linzer cookies

makes around 20

80CE6890-FB6C-4235-9A21-2F2CAF55118F.jpg

Cookies:

  • scant 2 cups (250 g) all-purpose flour

  • 3/4 cup + 1 T (110 g) confectioners’ sugar

  • 1/2 c + 6 T (200 g) unsalted butter, softened

  • 2 egg yolks

  • pinch of kosher salt

To finish:

  • 130 g raspberry jam

  • 2 T confectioners’ sugar, for sprinkling

Directions

  1. Place all cookie ingredients into a food processor, and pulse until it begins to come together. Once that happens, turn it to high speed until a completely homogenous dough is formed. Wrap it in plastic and refrigerate for at least 3 hours, up to 3 days.

  2. When ready to roll/bake: Take dough out of the fridge and let temper for about 1 hour; preheat the oven to 325 F and line cookie sheets with parchment paper.

  3. Lightly flour a counter surface and roll dough out to 1/8”-1/4” thickness. Use a 3” round biscuit cutter (or a cup with 3” diameter) to cut rounds. Re-roll scraps for more cookies. Use a 1” round cutter (I use small patterned cookie cutters) to cut out the centers of half of the rounds. Transfer the cookies without a cut-out to one prepared cookie sheet, and the ones with a cut-out to another.

  4. Bake for around 10 minutes, or until the cookies take on a golden color around the edges, rotating the pans halfway through baking. The cookies with the cut-out will take a bit less time than the ones without. When ready, remove from oven and slide the cookies (still on parchment paper) onto a cooling rack.

  5. Once they’re just cool enough to handle but still quite warm, flip the base cookies over and place 1 tablespoon of jam onto each. Spread the jam gently toward the edges, and return to a baking sheet and into the warm oven. Leave in for about 1 minute, to let the jam loosen up. Meanwhile, lightly dust the tops of the cookies with the cut-outs with 2 T powdered sugar.

  6. Take the base rounds out of the oven, and top with the finished tops. Let set for about 20 minutes and enjoy! The sandwiched cookies will become softer as they sit overnight, which I honestly love just as much as when they’re fresh and still crispy!

18122715-BE44-4350-9161-FCA0DFEC7E22.JPG
35CD4663-7851-4435-9355-EA9F542D899B.JPG

ginger-molasses cookies!

These cookies are 100% my weakness. Crispy/crackly on the outside and soft/chewy on the inside, ginger molasses cookies are just the best. A generous amount of grated fresh ginger, sorghum molasses, and almond flour make these particularly wonderful, and I think they make a perfect fall breakfast treat with coffee.

This recipe is adapted from the Tartine All Day cookbook; after I made the original recipe, I found that I loved the nuances of flavor/texture that the various alternative flours impart, but found myself wanting a thicker cookie. I tweaked it to yield my ideal composition, and also used sorghum molasses for an unanticipated flavor zing…but, traditional molasses is also lovely! I hope you enjoy!

A9C947B2-8B2D-447B-8116-052E70D2476A.JPG

Ginger-Molasses Cookies

adapted from Tartine All Day

Ingredients

  • 3/4 c (165 g) unsalted butter, softened

  • 1/2 c (100 g) granulated sugar

  • 1/2 c (105 g) light brown sugar, packed

  • 1/4 c (60 g) sorghum molasses (regular molasses is fine too!)

  • 3 T grated fresh ginger

  • 1 egg + 1 egg yolk, room temperature

  • 2 1/2 c (300 g) almond flour

  • 1 1/4 c (165 g) oat flour

  • 2 T brown rice flour

  • 2 T sweet rice flour

  • 1/4 c + 1 T (45 g) tapioca flour/starch

  • 3 t baking soda

  • 3/4 t salt

  • 1 T cinnamon

  • 1 T ginger

  • 1/2 t nutmeg

  • 1/2 t allspice

  • 1/2 t cloves

  • 1/2 cardamom

  • 1/2 c turbinado or raw sugar, for rolling

Directions

  1. In a mixer fitted with the paddle attachment, mix the butter and sugars until light/fluffy, about 5-10 minutes. Add the molasses and fresh ginger, and mix until incorporated. Scrape down the sides of the bowl and mix again for about 1 minute. Add the egg, followed by the egg yolk, scraping the sides of the bowl between additions.

  2. Whisk together the remaining dry ingredients, and add all at once to the mixing bowl. Start the mixer on the lowest speed, gradually increasing until the dough comes together. Scrape sides of bowl if necessary to achieve a homogenous mixture. Wrap the dough in plastic wrap, and refrigerate for at least 1 hour before baking (I recommend overnight-) or up to a few days.

  3. When ready to bake, preheat oven to 350 F and line baking sheets with parchment paper. Fill a small bowl with the turbinado sugar and set aside. Shape cookies into golf ball size balls (I like to weigh them out—25 or 30 grams is my go-to) and roll in the turbinado sugar to coat before placing 2” apart on baking sheet. Bake for around 12 minutes until they are cracked and the centers are no longer wet. The edges should be set but the middles should be soft to the touch*. (Bake longer for crispy cookies, bake shorter for softer cookies)

    *I like to pull them out while I know the centers still need a minute to bake, and I leave them to cool on the pan which continues the cooking and gives a nice crispy edge while allowing the middles to stay soft.

E96426B9-EC5F-45A7-8157-9010CF10EABB.JPG
E9B2921E-FC2C-466B-BA9A-140EC2AAD543.JPG

chocolate chip cookies!

This is my favorite recipe for chocolate chip cookies, one that I’ve known since college and have tweaked over the years. Though I rarely make them anymore without whimsical twists (orange zest and milk chocolate, rye flour and espresso, etc.), I kept this last batch 100% classic, and found them as addicting as ever.

I brown the butter to add extra richness/nuttiness, and to make up for the lost moisture, add a bit of whole milk. In lieu of milk, I’ve added a splash of coffee and even rum before, and recommend going with whatever you’re feeling! …but if you’re aiming for a more classic cookie, milk is a safe bet.

Another note is about the chocolate! My favorite brand is Tcho, and I use a 50/50 mixture of their milk chocolate and bittersweet chocolate disks. While I believe that chocolate chip cookie quality is determined by texture and the nuances of flavor in the dough itself, finding the most delicious chocolate doesn’t hurt either! That is to say—I simply love Tcho chocolate, but any brand of chips, chunks, or bars that you already have will yield excellent results.

5730A792-4FAF-4BFD-89B0-904453FEDDA7.JPG

Chocolate-Chip Cookies

  • 3/4 c (1 1/2 sticks, 171 g) unsalted butter

  • 2 c + 2 T (280 g) flour

  • 1/2 t baking soda

  • 1/2 t salt

  • 1 c (210 g) packed light or dark brown sugar

  • 1/2 c (100 g) sugar

  • 2 eggs, room temperature*

  • 1 t + 1 t whole milk

  • 1 t vanilla

  • 1-1 1/2 c (10 oz.) chocolate chunks or chips

  • coarse sea salt, for sprinkling

*Note: you’ll only use 1 egg + 1 egg yolk, but both should be at room temperature.

  1. Start by browning the butter: melt the butter in a medium saucepan or pot over medium heat. Let the butter continue cooking and swirl the pan occasionally to promote even browning. The butter will sputter and bubble, and finally, as it browns, it will foam. Once it gives off a nutty aroma and is dark amber in color, take off the heat and immediately pour into a heat-proof liquid measuring cup. It should reach 2/3 cups. If you’re inclined, scrape the bottom of the pan with a spatula to add all of the toasted milk solids. (I like the super toasty/rich flavor these add, but just make sure to avoid any blackened bits) Set the browned butter aside, and let cool to lukewarm/room temperature.

  2. Whisk the dry ingredients together in a medium/large bowl and set aside.

  3. In the bowl of an electric mixer fitted with the paddle attachment, thoroughly mix the butter and sugars. Scrape the sides of the bowl/paddle down once or twice, and continue mixing until the mixture is pale in color and homogenous. I typically allow 10 minutes for this creaming process. When ready, beat in the egg, followed by the yolk. Scrape the sides down and add the vanilla and the milk. Scrape the sides down again, and add the dry ingredients. Starting at the lowest speed, mix the dough, gradually increasing the speed, until just combined. Add the chocolate chunks and beat at medium/high speed for about 1 minutes, or until evenly mixed. Wrap the dough in plastic wrap and refrigerate for a few hours, or overnight for best results.

  4. When ready to bake, heat the oven to 350 F. Scoop the dough into tablespoon size rounds (about 25 g) and set on parchment lined baking sheets, about 1.5” apart. (I bake off as many as I need at a time, and keep the remaining dough in the fridge or freezer for a rainy day.)

  5. Bake for 10-12 minutes, until the centers are puffed and still a bit pale, but the edges are golden and set. Using the parchment paper to slide, I like to immediately transfer the cookies onto a cooling rack to prevent the bottoms from getting too dark. Sprinkle with coarse sea salt if desired, and enjoy!

^cookies no more than 1 minute out of the oven—puffed, pale in center but set around the edges!

^cookies no more than 1 minute out of the oven—puffed, pale in center but set around the edges!

FF6222BC-C46D-4640-B9C4-6CBFCC41F08F.JPG

tahini-almond snickerdoodles!

These are what happened when I couldn’t decide between making snickerdoodles or peanut butter cookies, and then stumbled upon tahini in my kitchen cabinet while pulling ingredients. I love them for the way the edges crunch with a cinnamon-sugary crust, and how the middles stay chewy and soft. The tahini adds an almost-bitter note, soothed over by the almond sweetness.

To me, a baked good is worth it’s salt (….calories?!) when it not only satiates your sweet tooth but also intrigues your taste buds, and these absolutely keep me wanting more.

742DBEE4-AAEE-492B-8015-B4B6BF00423F.JPG

tahini-almond snickerdoodles

cookies

  • 1 cup (228 g) unsalted butter

  • 1 cup (220 g) packed light brown sugar

  • 1 cup (200 g) granulated sugar

  • 2 large eggs

  • 1/2 t vanilla

  • 1 t almond extract

  • 400 g tahini (if separated, stir with a fork until completely smooth)

  • 2 2/3 cup (360 g) all-purpose flour

  • 1 t baking soda

  • 1 t sea salt

  • 1 t cinnamon

  • 1 cup slivered almonds

cinnamon-sugar

  • 1 T cinnamon

  • 1 t cardamom

  • 1/2 cup (100 g) sugar

directions

  1. Beat butter and sugars together in stand mixer with paddle attachment until mixture is light, soft, and batter-like, about 12-15 minutes on medium/high speed. Scrape the bowl/paddle and beat for an additional 3-5 minutes, until completely homogenous. Add the eggs, one at a time, beating thoroughly after each one. Scrape down the bowl and mix again until completely smooth, then add the vanilla and almond extracts.

  2. Add the tahini, and beat until it’s thoroughly mixed in. Scrape down sides of bowl and mix again!

  3. Whisk together the flours, baking soda, salt, and cinnamon. Add the slivered almonds and toss to coat. On low speed, add to the mixing bowl and beat until incorporated.

  4. Scrape the dough into an airtight container or divide into halves and wrap tightly in plastic wrap. Refrigerate overnight (flavors will develop and it’ll be easier to handle!).

  5. When ready to bake, preheat oven to 350 F and line cookie sheet(s) with parchment paper. Whisk together the sugar, cardamom, and cinnamon in a small bowl. Shape dough into rounded tablespoons (size should be just shy of a golf ball) and space 1.5″ apart onto the prepared cookie sheet; press down to flatten a bit. When the whole sheet is full, roll each cookie in the cardamom sugar and then back into its place. Finally, if desired, press firmly with a fork for traditional peanut butter cookie design.

  6. Bake cookies for about 10 minutes before checking on them–when they’re ready, they’ll be lightly browned around the edges, puffed, cracked, and not overly soft/wet in the center. You can also check by using your index finger and thumb to lightly “squeeze” a cookie; if it seems set and not squishy, and the bottom is golden, they’re ready. Cool for a few minutes on the cookie sheet before placing them directly on rack to cool completely!

Note! This dough can be wrapped tightly in plastic or an airtight container and kept frozen for future cravings!

287DF2BD-36B0-40D5-A587-E3E547CEB026.JPG